
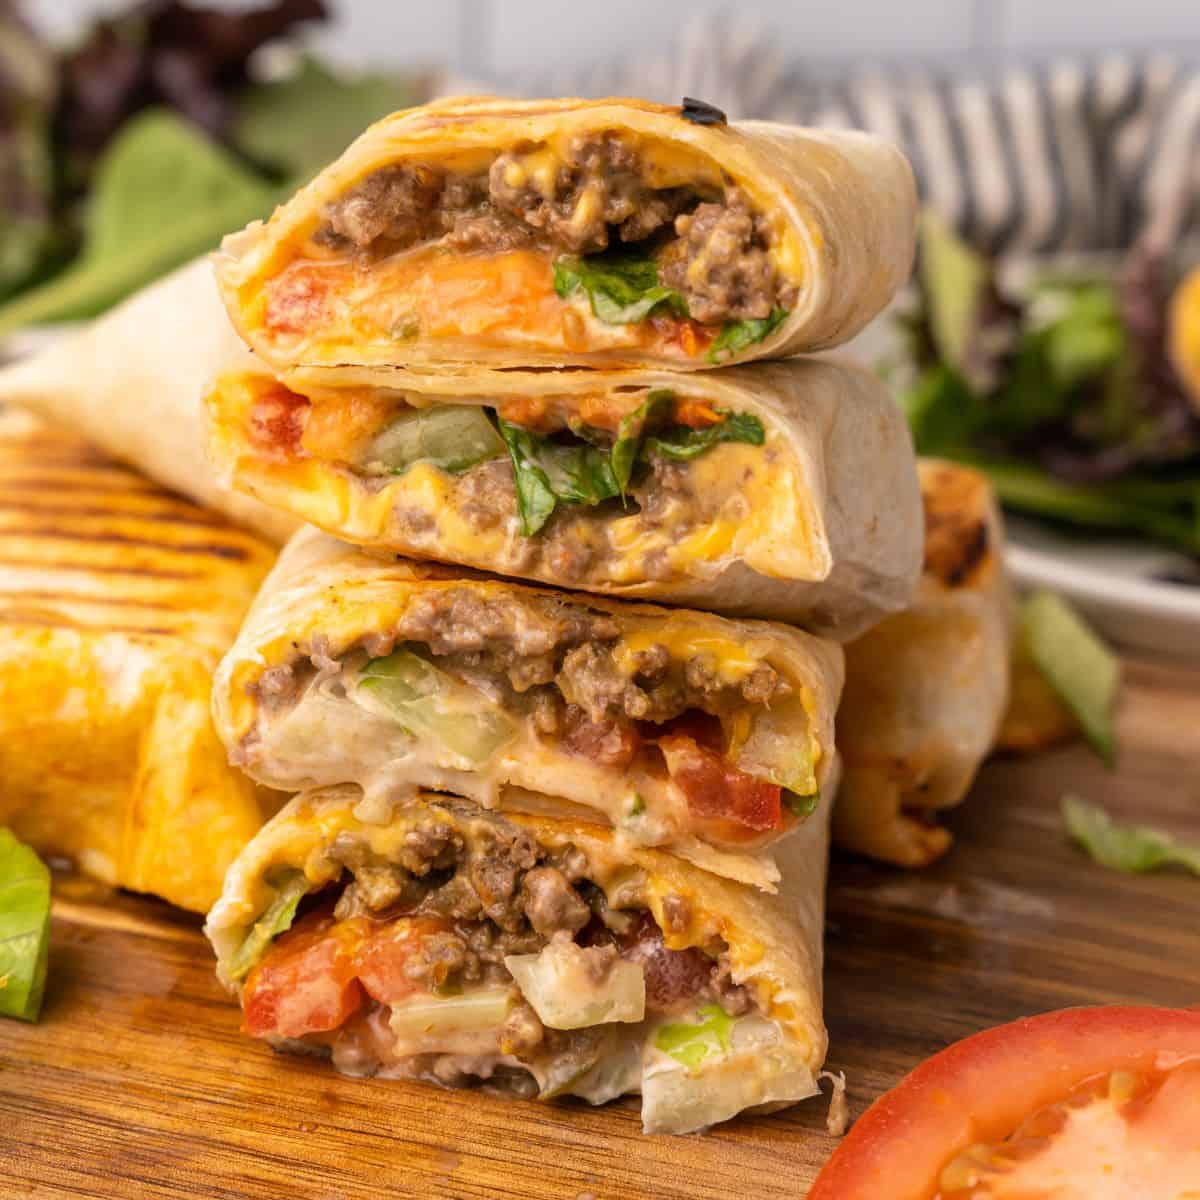
If you’re craving a juicy cheeseburger but want something that’s easier to make, easier to eat, and a little lighter, this Cheeseburger Wrap Recipe is exactly what you’re looking for.
Each wrap is filled with seasoned ground beef, melty cheese, and your favorite burger toppings, then grilled until the tortilla is perfectly golden and crispy. It has all the flavors of a classic cheeseburger with a fun twist that’s perfect for busy weeknights.
Whether you’re looking for a quick family dinner, another easy way to use ground beef besides tacos or sloppy joes, or you’re simply trying to stay out of the drive-thru, these grilled cheeseburger wraps deserve a spot on your meal plan.
Quick Look at the Recipe
- Prep Time: 10 minutes
- Cook Time: 15 minutes
- Total Time: 25 minutes
- Flavor: Juicy, cheesy, crispy, and loaded with classic burger flavor
- Best For: Busy weeknights, meal prep, family dinners
The Burger Wrap That Cures My Big Mac Craving Every Time

Here’s a fun fact – this was the second recipe I ever published on Organize Yourself Skinny back in 2011. Yep…I’ve been making these cheeseburger wraps for a long time.
Since then, this recipe has been shared more than 200,000 times, and honestly, I’m not surprised. We’ve made it hundreds – if not thousands – of times over the years, and it still lands on our meal plan at least once or twice a month.
Why? Because it checks all the boxes.
It’s ready in about 30 minutes, packed with juicy burger flavor, high in protein, easy to customize, and it completely satisfies those “I really want a cheeseburger” cravings without heading through the drive-thru.
Another reason I love this recipe is that it’s a great way to use ground beef when you want something different than tacos, sloppy joes, or spaghetti. And who doesn’t love all that Big Mac flavor wrapped up in a tortilla and grilled until crispy? Yum!
If your family loves burger-inspired dinners as much as mine does, you should also try my Cheeseburger Stuffed Peppers, Cheeseburger Macaroni, Cheeseburger Salad, or Cheeseburger Soup, for another easy weeknight meal.
Enjoy!

Ingredients
You only need a handful of simple ingredients to make these grilled cheeseburger wraps. The full recipe and measurements are in the recipe card below, but here’s a closer look at what you’ll need and a few of my favorite tips for making them turn out delicious every time.
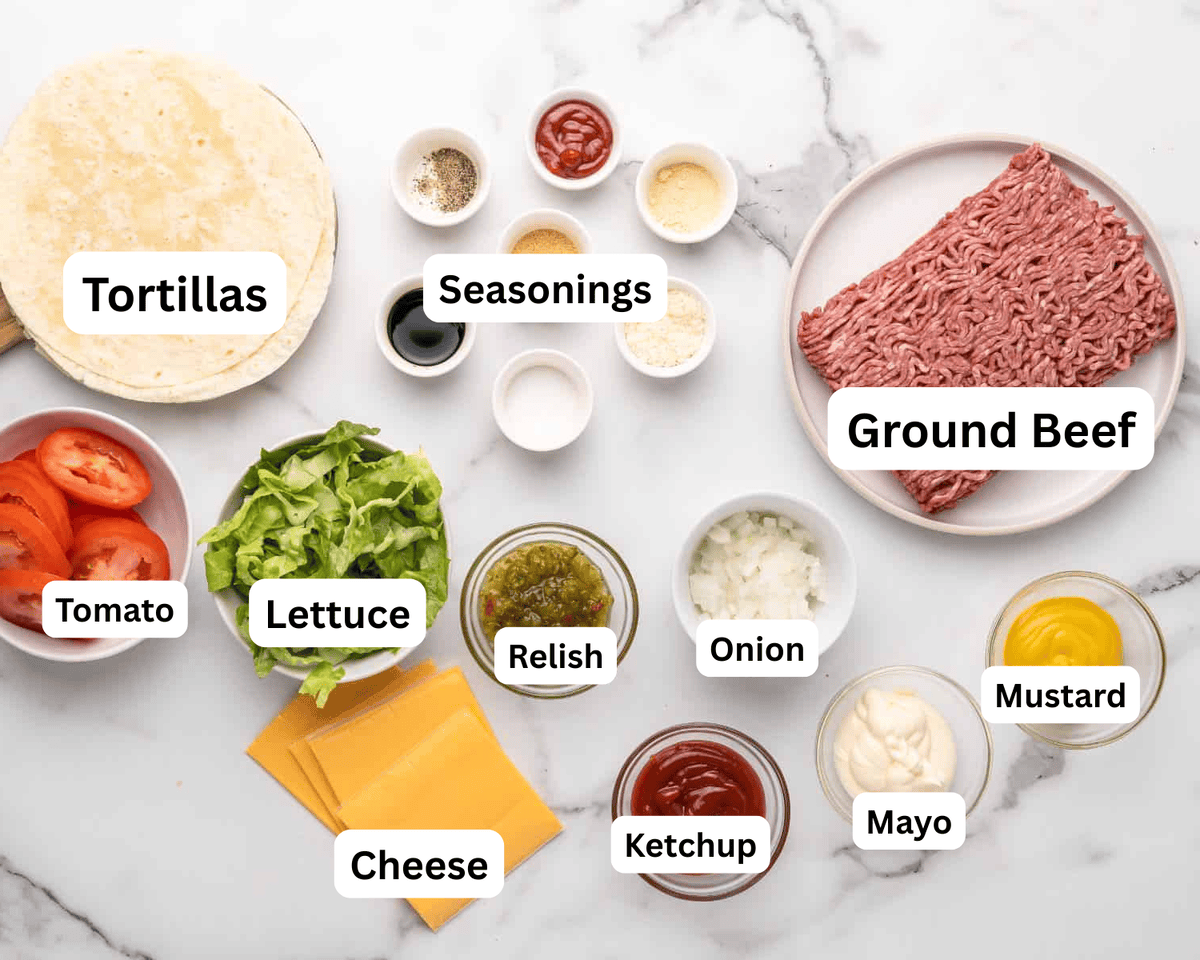
- Ground Beef. I use 93/7 lean ground beef because it gives you all the juicy burger flavor without a lot of excess grease. You can certainly use 85/15 if that’s what you have on hand, but be sure to drain the grease well after cooking.
- Worcestershire Sauce. This is my secret ingredient for just about every ground beef recipe I make – including these cheeseburger wraps. It adds a rich, savory flavor that makes the beef taste like it came straight off the grill. I don’t recommend skipping it. If you don’t have Worcestershire sauce, soy sauce or tamari (for a gluten-free option) will also add a delicious umami flavor.
- Ketchup. Just a little ketchup adds that classic cheeseburger flavor to the beef mixture without making it overly sweet.
- Parmesan Cheese. This might sound a little unexpected, but grated Parmesan melts right into the ground beef and adds another layer of savory, cheesy flavor. It’s one of those small ingredients that makes a big difference.
- Seasonings. Garlic powder, onion powder, salt, and black pepper are all you need. These simple seasonings let the burger flavor shine without overpowering the other ingredients.
- Tortillas. I like using medium-sized flour tortillas because they’re the perfect size for holding the filling while still keeping the wraps easy to roll and portion-controlled. You can also use high-protein, low-carb, or gluten-free tortillas if you prefer.
- American Cheese. If you want that classic burger flavor, American cheese is hard to beat because it melts beautifully. However, cheddar, Colby Jack, pepper jack, Swiss, or mozzarella are all delicious options too.
- Burger Toppings. Shredded lettuce, diced tomatoes, onions, and pickles are my family’s favorites. One of the best things about this recipe is that everyone can customize their own wrap with their favorite burger toppings.
- Condiments. Ketchup and mustard are classic, but don’t stop there. We also love mayonnaise, dill relish, barbecue sauce, chipotle mayo, or even a homemade Big Mac-style sauce. My favorite tip? Add the condiments before grilling the wrap. Trust me – it makes every bite taste like a cheeseburger.
Supplies
- Lodge Grill Pan. If you’ve been around OYS for a while, you already know how much I love my Lodge grill pan. I use it year-round to make these cheeseburger wraps, turkey burgers, chicken, vegetables, and even grilled sandwiches when it’s too cold to cook outside. It’s relatively inexpensive, built to last, and gives these wraps those crispy grill marks that make them taste even more like a restaurant burger. Purchase it on Amazon.
If you enjoy meal prepping and cooking as much as I do, be sure to check out my Amazon Store, where I’ve rounded up all of my favorite kitchen tools, meal prep containers, and cooking essentials. These are the products I use every week in my own kitchen and recommend most often.
How to Make Cheeseburger Wraps (Step-by-Step)
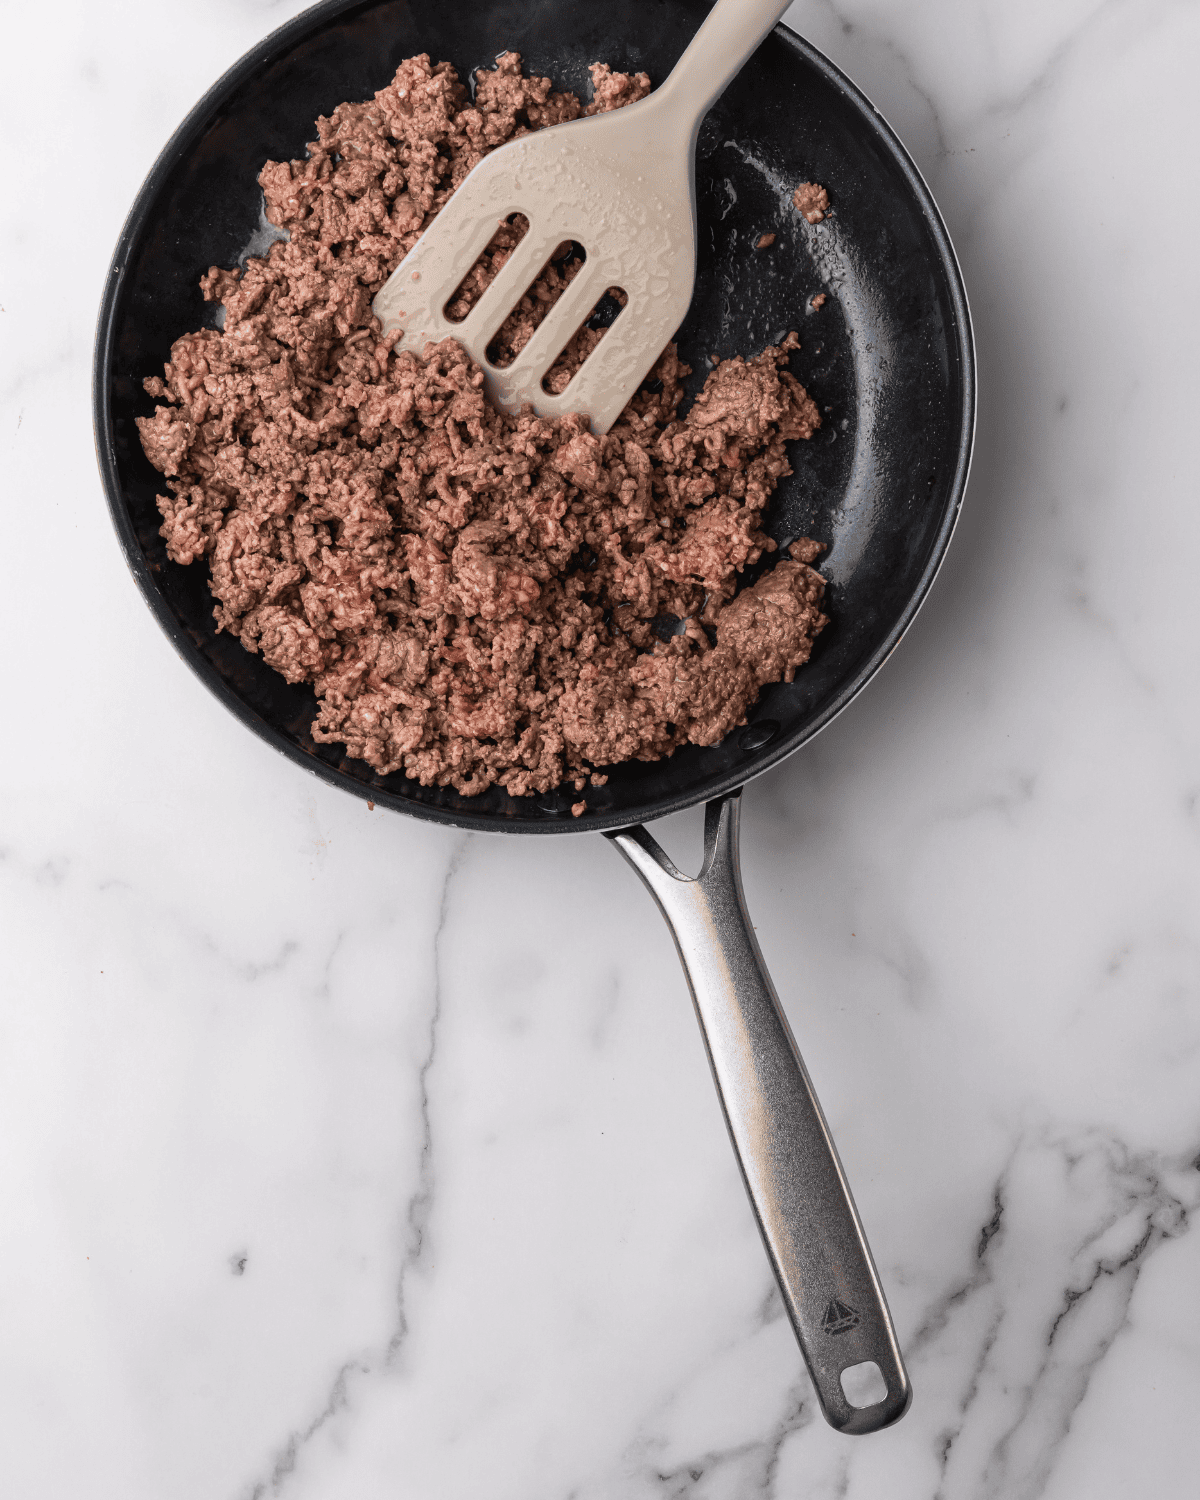
Step 1: Brown the Ground Beef. Heat a large skillet over medium heat and coat it lightly with cooking spray. Add the ground beef and cook for 7–10 minutes, breaking it up with a wooden spoon as it cooks. I like to leave a little pink in the beef before adding the seasonings so they have a chance to cook right into the meat.
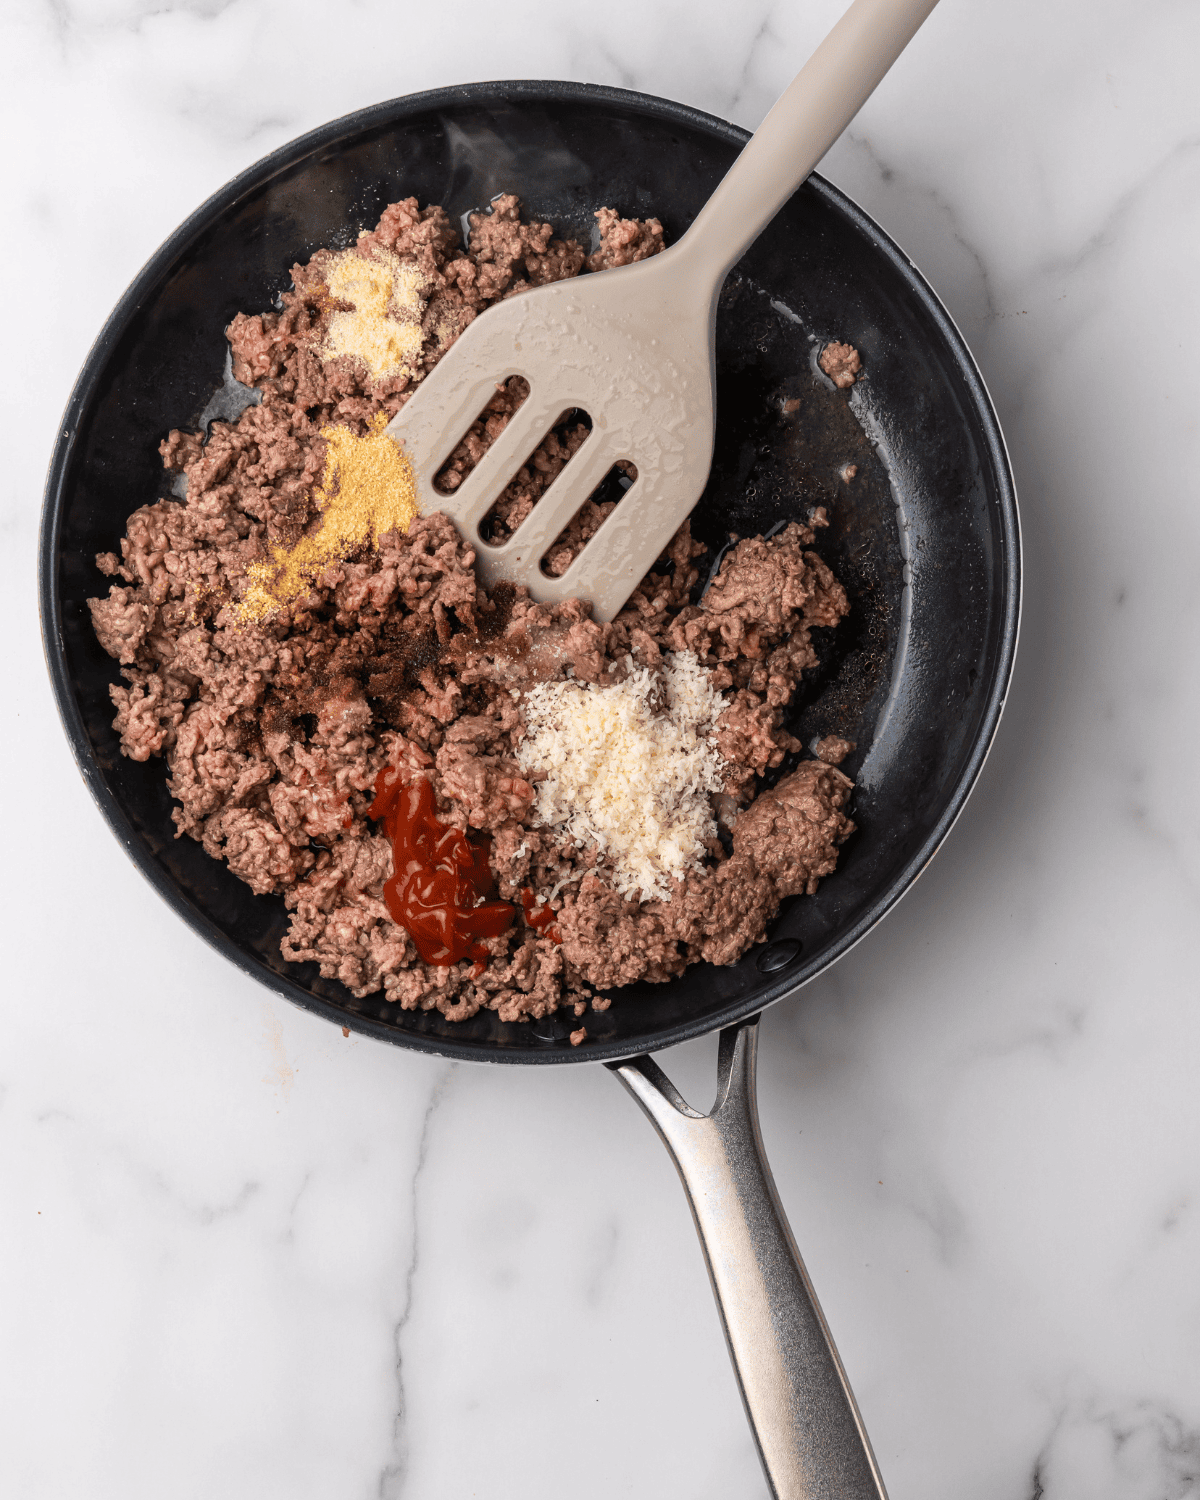
Step 2: Season the Beef. Stir in the Worcestershire sauce, ketchup, Parmesan cheese, garlic powder, onion powder, salt, and black pepper. Continue cooking until the beef is no longer pink and everything is well combined. Don’t skip the Worcestershire sauce! It’s one of my favorite tricks for making ground beef taste richer and more like a restaurant-style burger.
Step 3: Assemble the Wraps. Lay a tortilla flat on your work surface. Place one slice of American cheese in the center, then spoon about ⅓ cup of the cheeseburger filling over the cheese. Top with shredded lettuce, diced tomatoes, onions, pickles, or any of your favorite burger toppings.
Step 4: Add the Condiments. This is one of my favorite parts! Drizzle on a little ketchup, mustard, mayonnaise, or your favorite burger sauce before rolling up the wrap. I know it might seem strange to add the condiments before grilling, but trust me – it gives every bite that classic cheeseburger flavor.
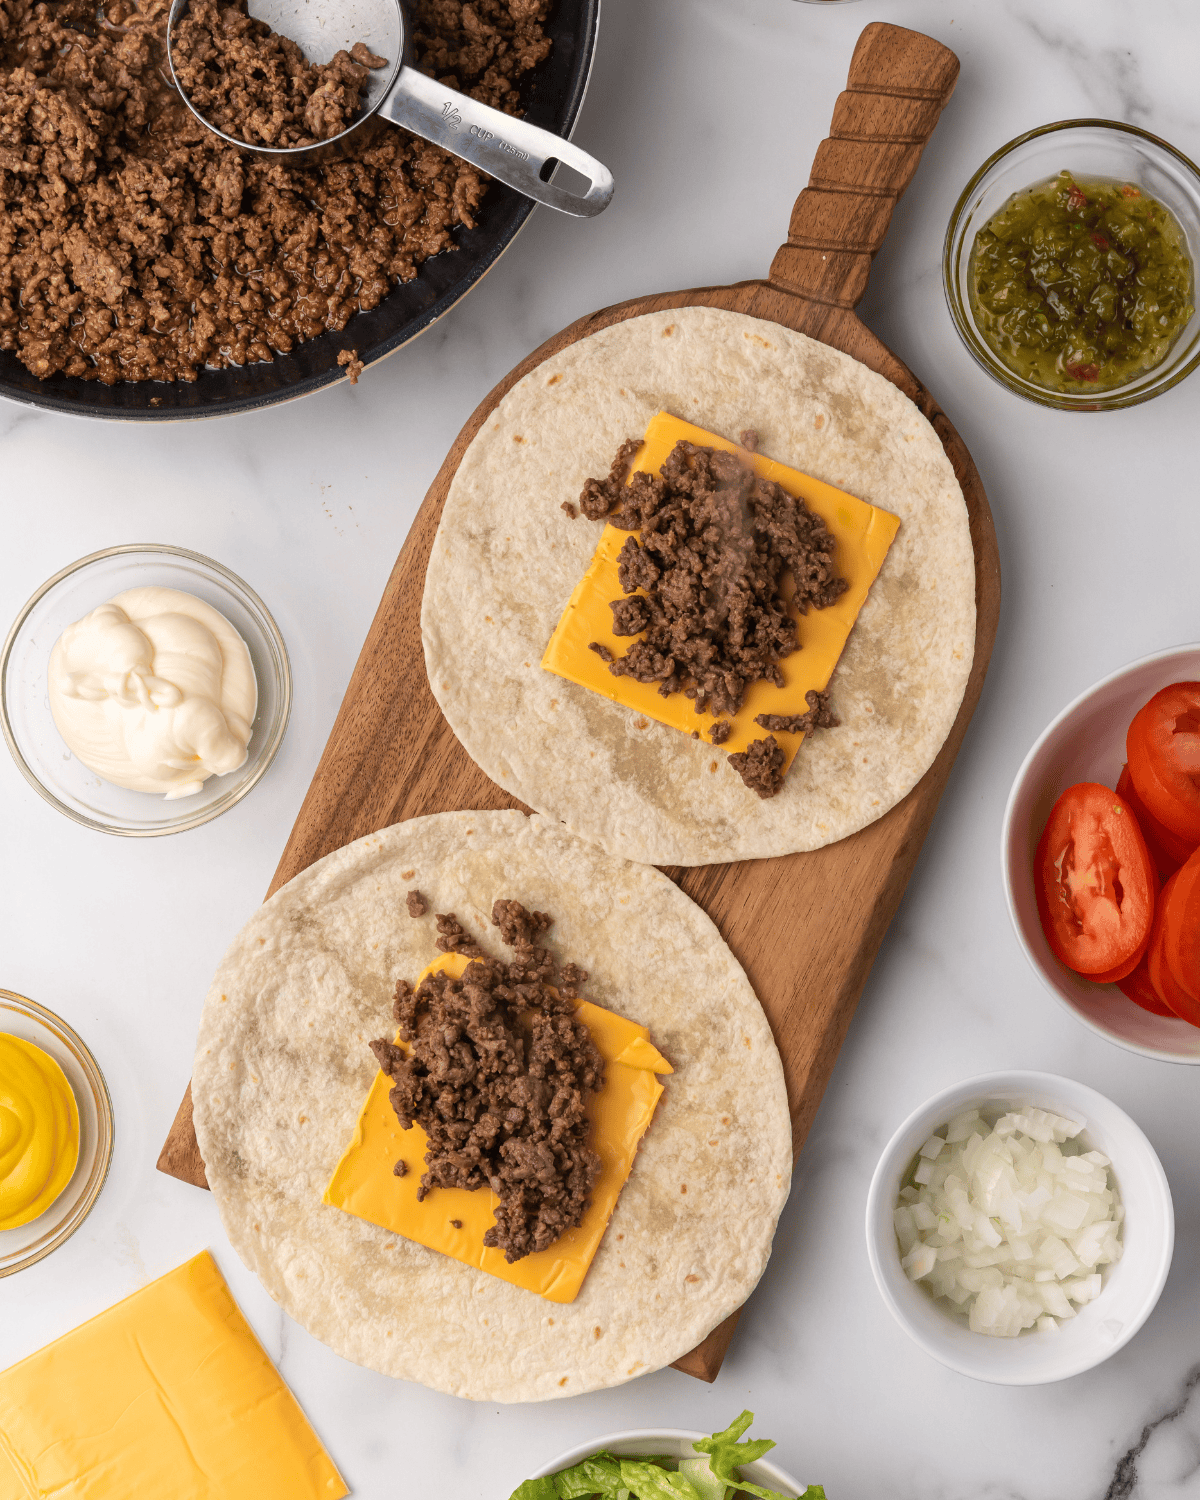
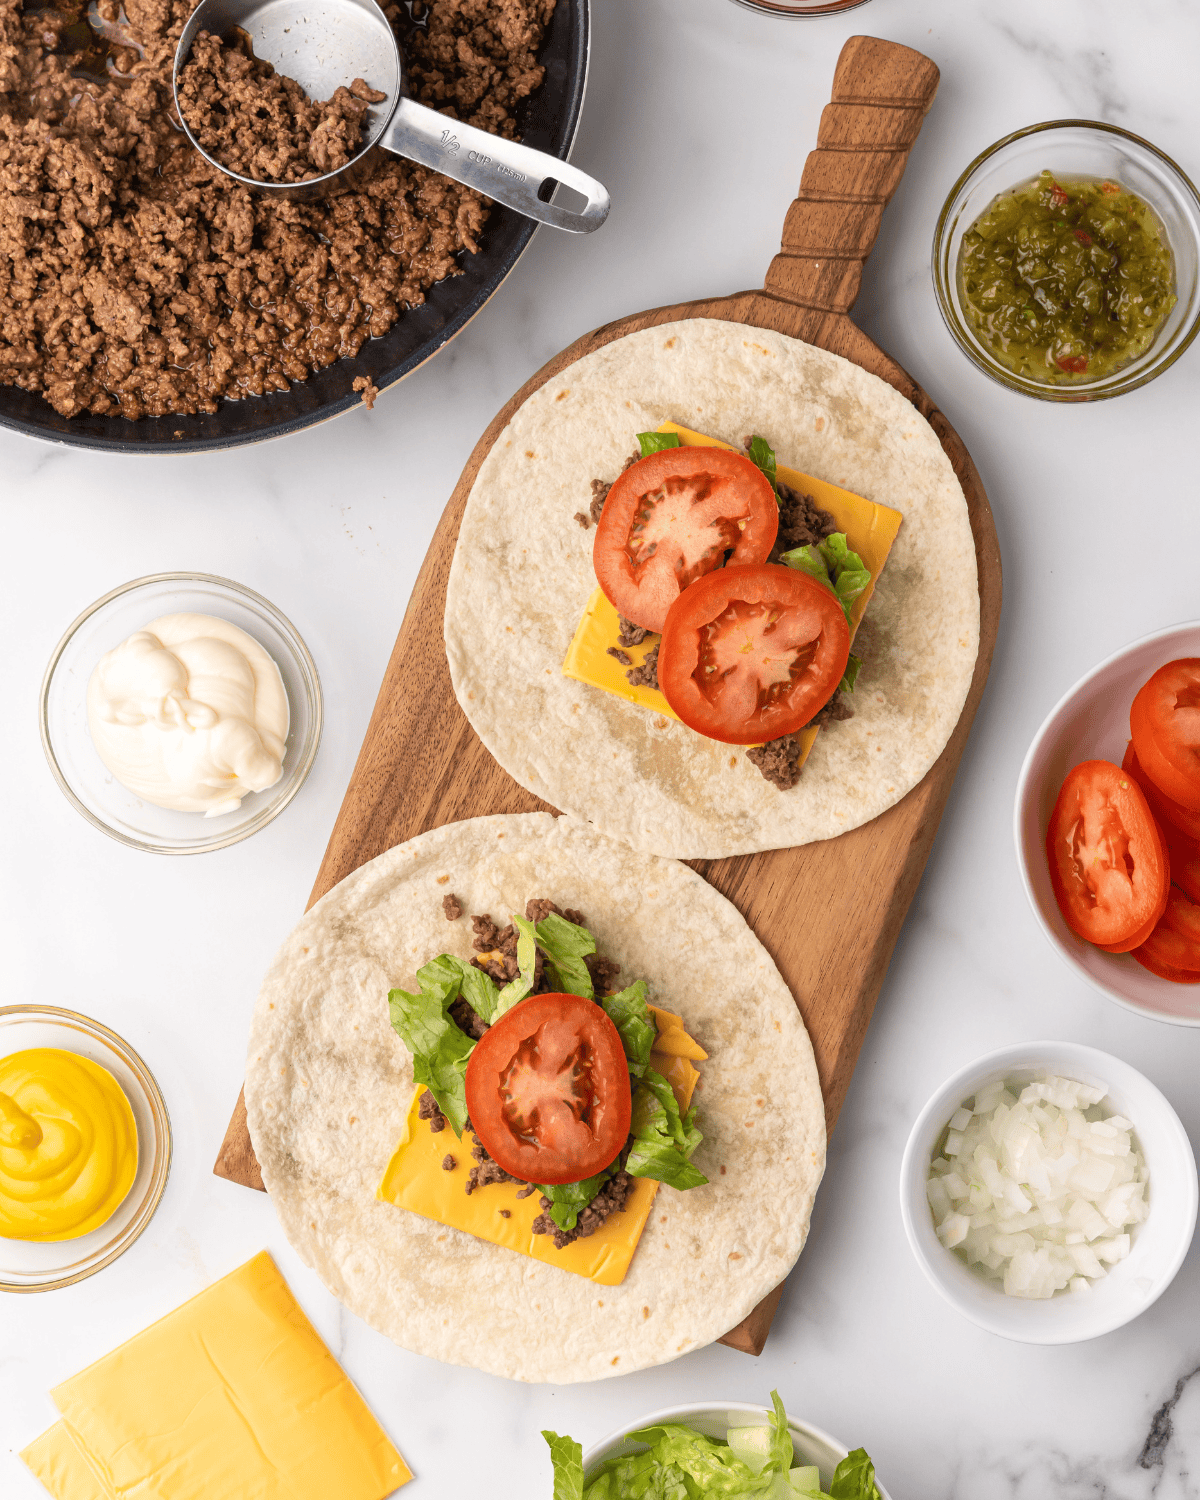
Step 5: Roll the Wrap. Fold in the sides of the tortilla, then roll it up tightly like a burrito. Make sure the seam is on the bottom so it stays closed while grilling.
Step 6: Grill Until Crispy. Place the wrap seam-side down on a preheated grill pan, indoor grill, or skillet over medium heat. Cook for 3 – 4 minutes, or until the tortilla is golden brown and crispy with grill marks. Flip the wrap and cook for another 3–4 minutes on the other side.
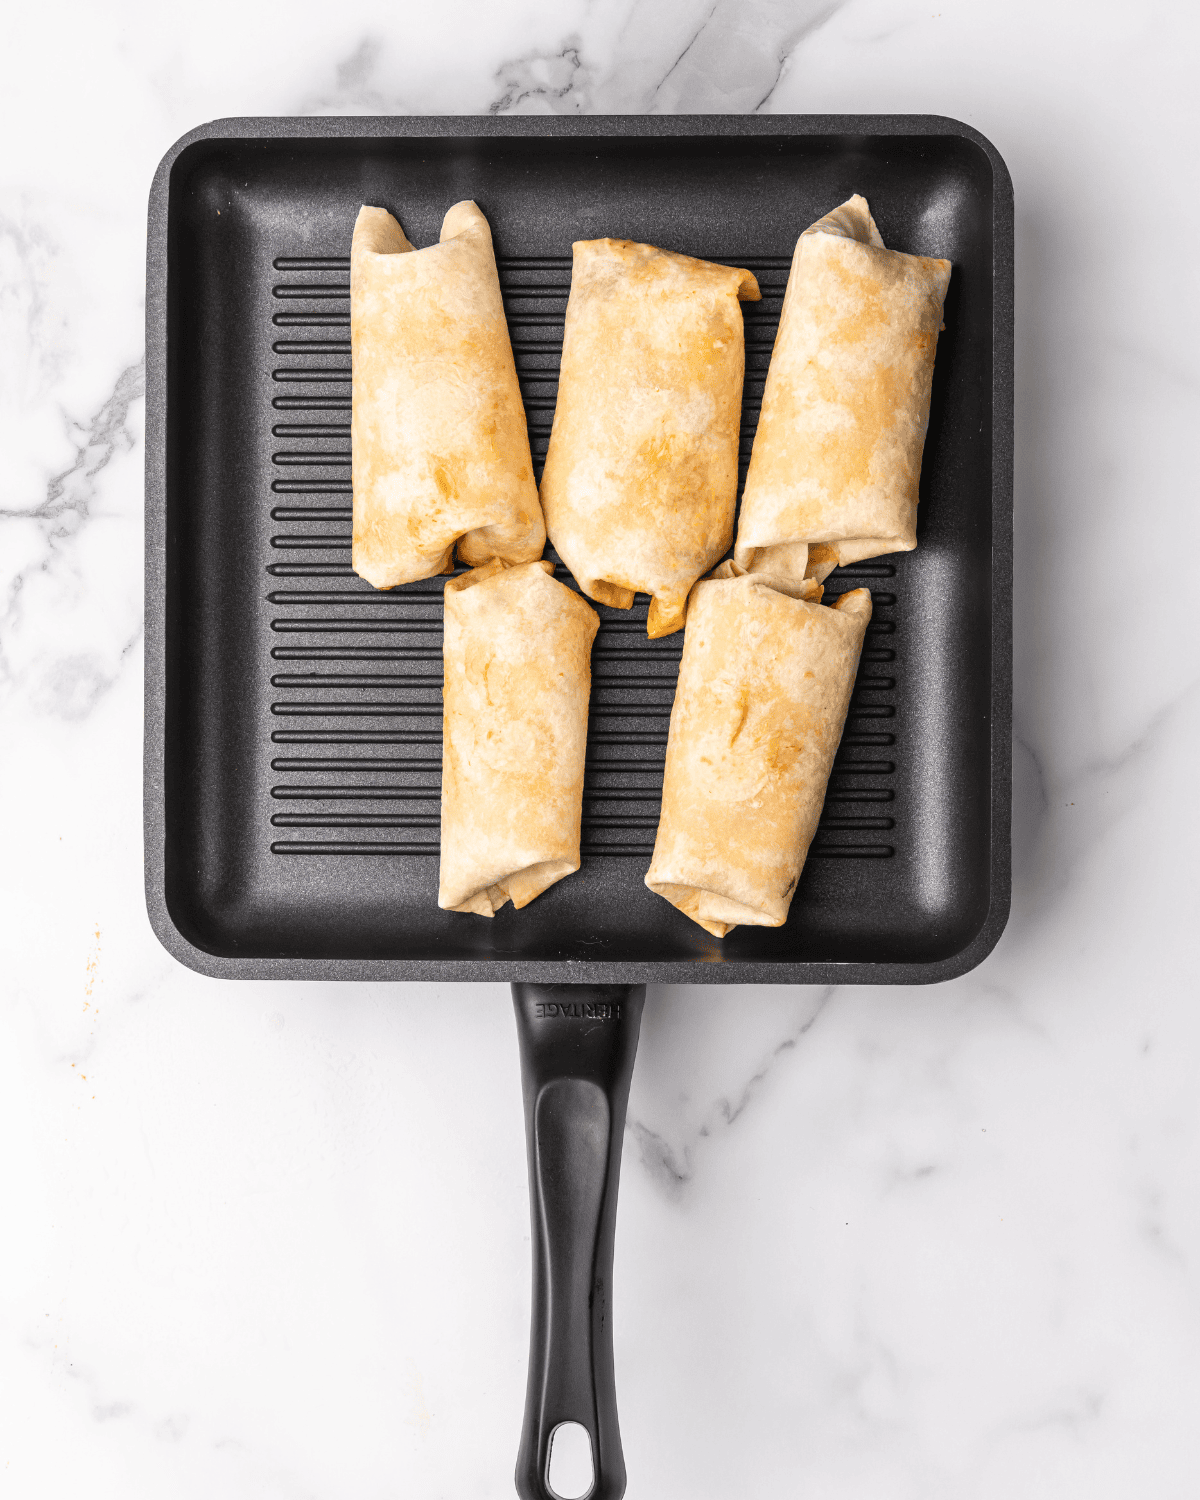
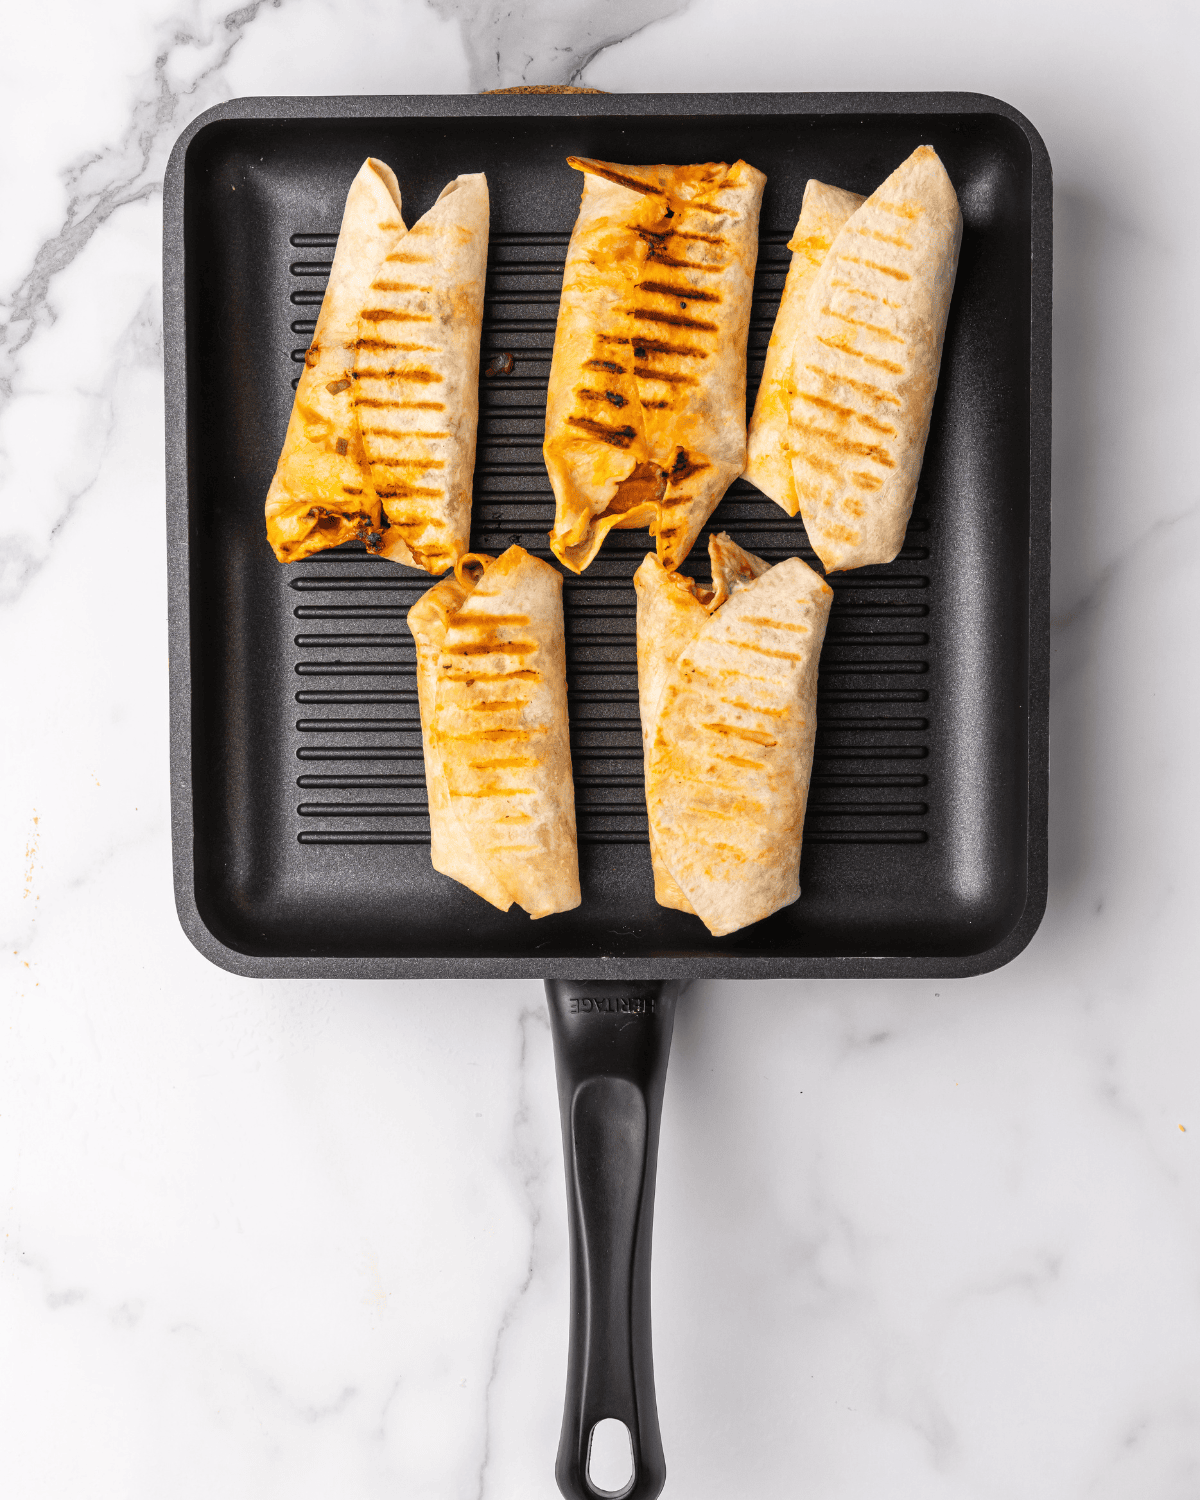
Step 7: Let It Rest and Serve. Transfer the wrap to a cutting board and let it sit for a minute before slicing it in half. This gives the cheese a chance to set up just enough so it doesn’t ooze out when you cut into it. Serve with your favorite burger sides and enjoy!
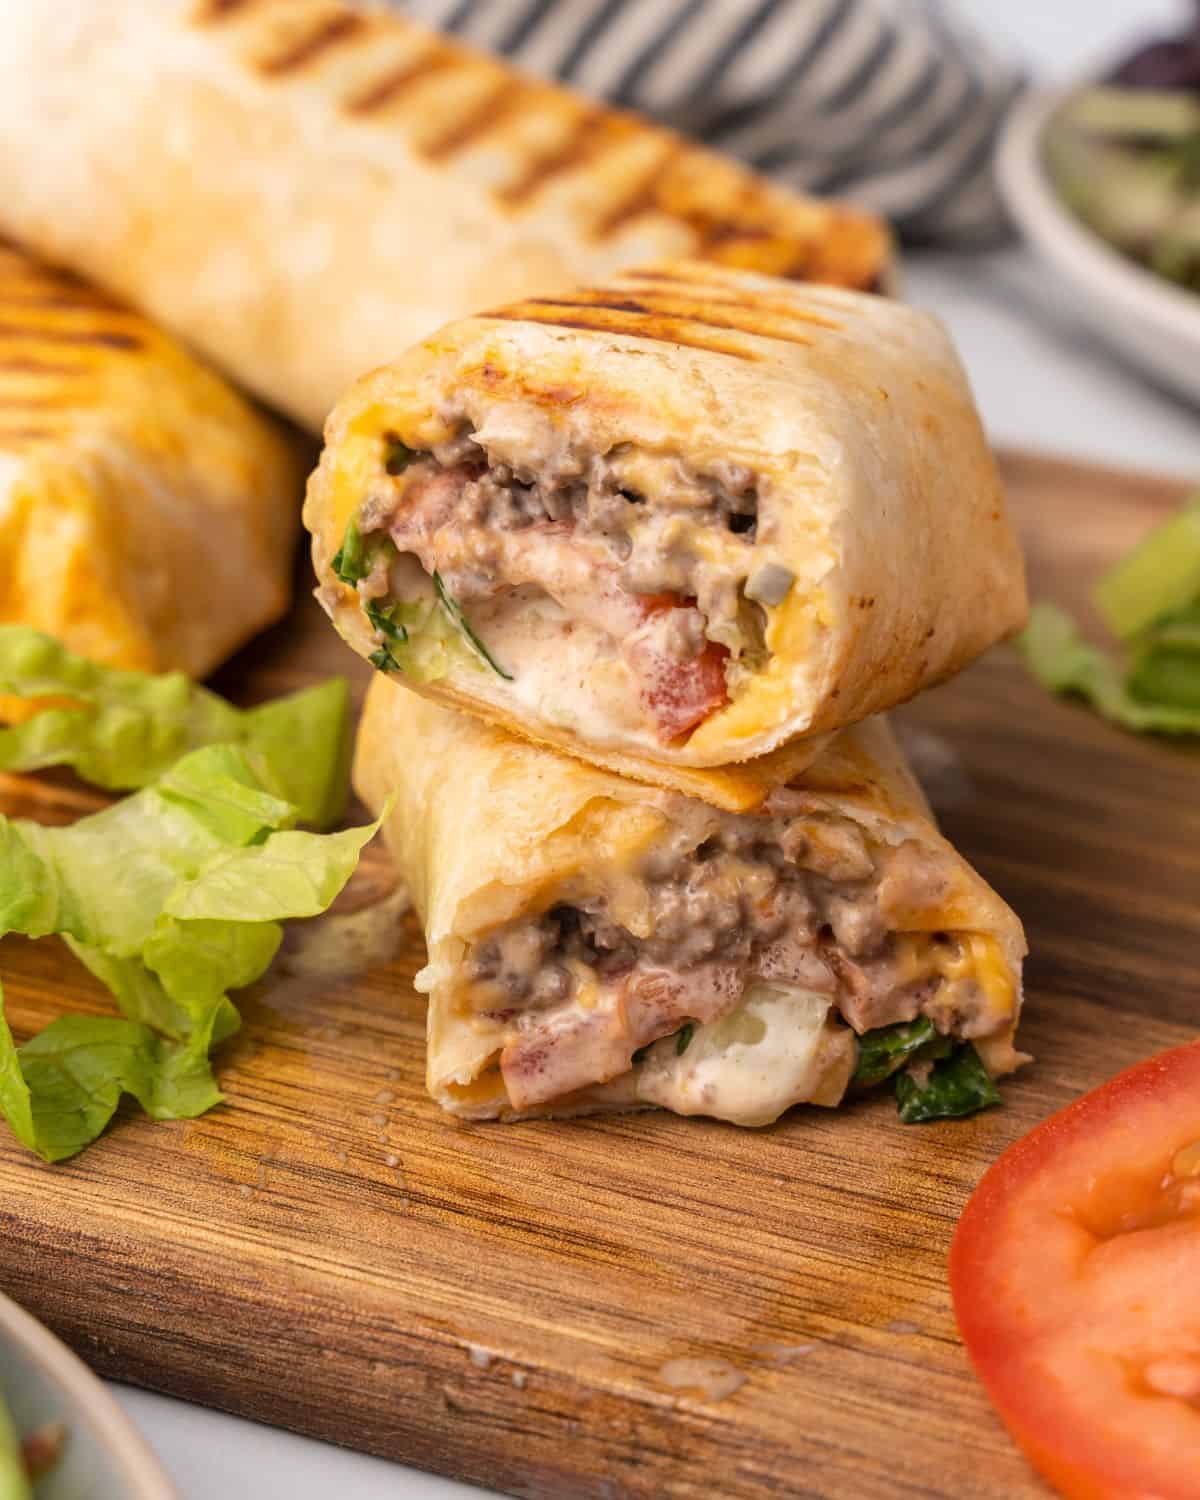
Expert Cooking Tips
- Don’t skip the Worcestershire sauce. This is what gives the ground beef that rich, savory burger flavor. It’s a small ingredient, but it makes a big difference.
- Drain the beef if needed. If you use 85/15 ground beef, you’ll likely have more grease in the pan. Drain it before adding the rest of the seasonings so the filling doesn’t make the tortilla soggy.
- Warm the beef before assembling. If you make the filling ahead of time, warm it before adding it to the wrap so the cheese melts better.
- Don’t overfill the tortilla. Too much filling makes the wrap harder to roll and more likely to fall apart while grilling.
- Grill seam-side down first. This helps seal the wrap and keeps everything tucked inside.
- Let the wrap sit for a minute before slicing. This helps the cheese settle slightly so the filling doesn’t spill out as soon as you cut it.
Variations
One of the reasons this recipe has stayed on our meal plan for so many years is because it’s incredibly easy to customize. The juicy ground beef filling is the perfect starting point for all kinds of burger-inspired flavors. Here are some of our favorite ways to change it up.
- Big Mac Cheeseburger Wrap. If you’re craving a Big Mac but want to skip the drive-thru, this is the variation to make. Use American cheese, shredded lettuce, diced onions, pickles, and a homemade Big Mac-style sauce for all the classic flavors wrapped inside a crispy tortilla.
- BBQ Bacon Cheeseburger Wrap. Mix a little barbecue sauce into the ground beef, then add crispy bacon and sharp cheddar cheese before grilling. This version tastes like something you’d order at your favorite burger restaurant.
- Mushroom Swiss Burger Wrap. Sauté sliced mushrooms until they’re golden brown, then add them to the wrap with Swiss cheese. It’s rich, savory, and one of my husband’s favorite variations.
- Jalapeño Popper Burger Wrap. If you like a little heat, add sliced jalapeños, pepper jack cheese, and a drizzle of ranch or cream cheese spread before grilling. It has all the flavors of a jalapeño popper with the heartiness of a cheeseburger.
- Chipotle Burger Wrap. Spread a little chipotle mayo on the tortilla, then add pepper jack cheese, lettuce, tomato, and red onion. The smoky, slightly spicy flavor takes this burger wrap to the next level.
- Blue Cheese Burger Wrap. If you’re a blue cheese fan, this one is delicious. Add blue cheese crumbles, lettuce, tomato, and a drizzle of your favorite steak sauce for a bold, restaurant-style burger wrap.
- Pizza Burger Wrap. This is always a hit with kids. Swap the American cheese for mozzarella, add a little pizza sauce, and sprinkle in some pepperoni before grilling for a fun twist on pizza night.
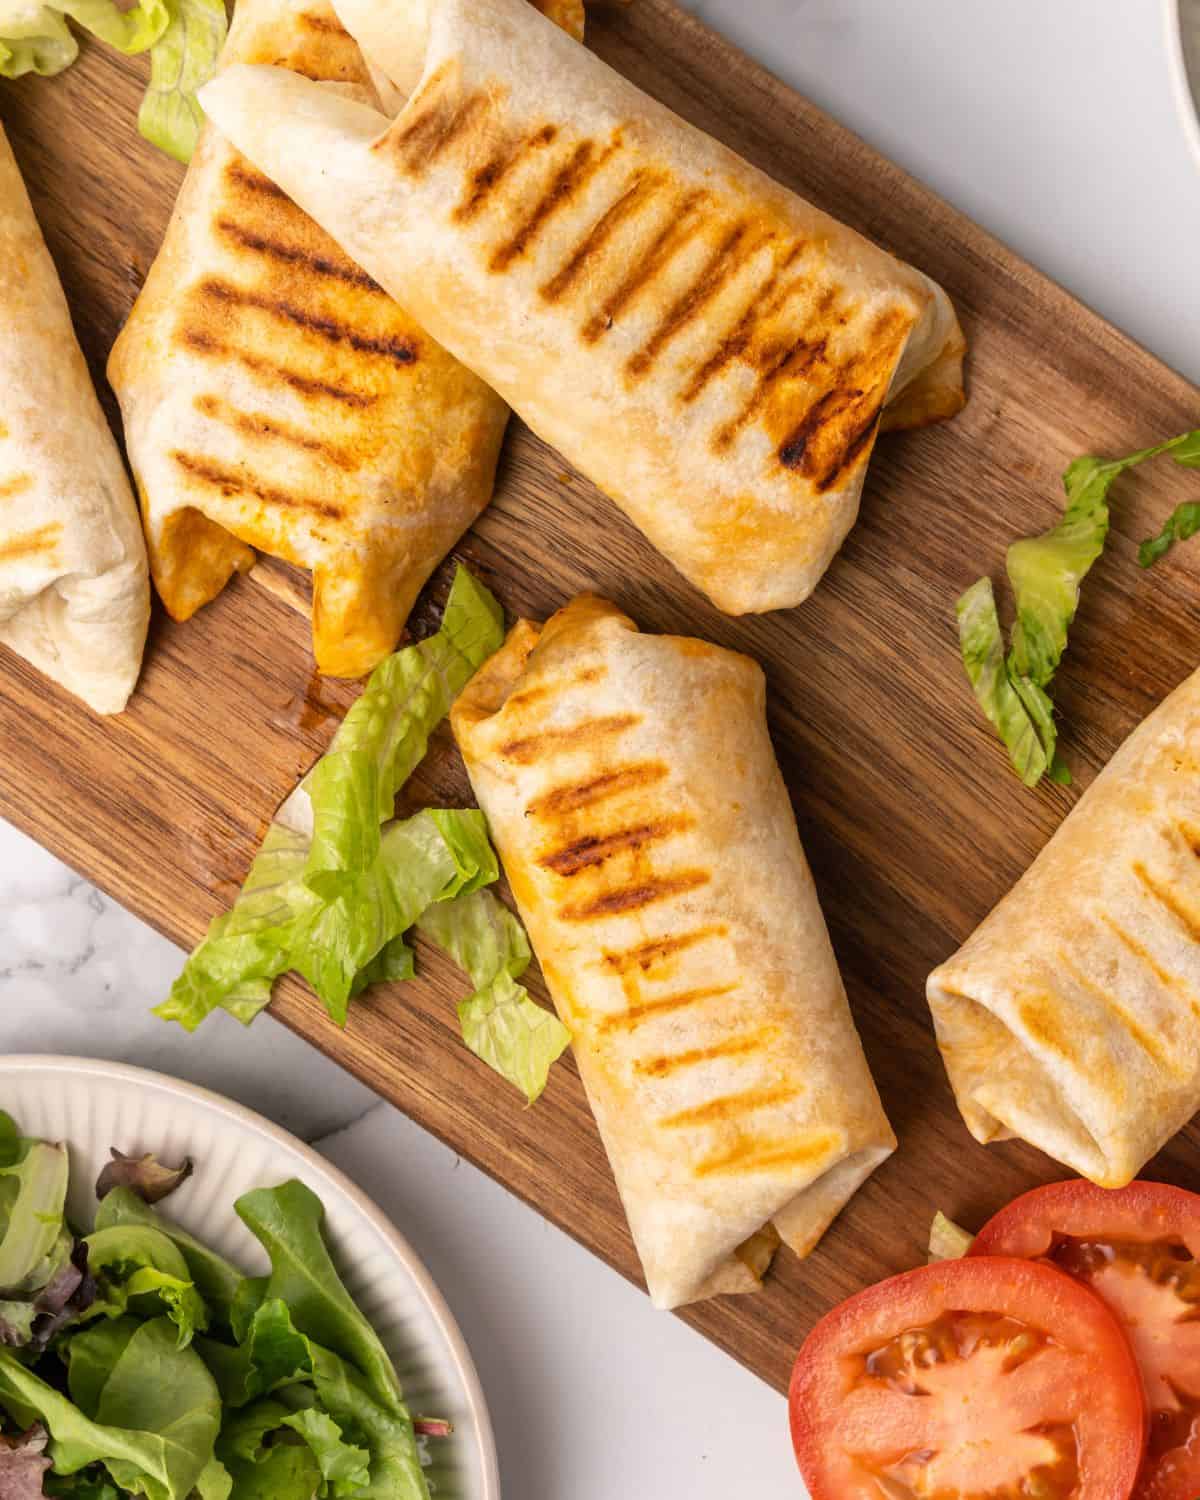
Easy Swaps
Whether you’re trying to eat more protein, cut back on carbs, eat gluten-free, or simply lighten things up a bit, these easy swaps let you customize the recipe while still enjoying all that delicious cheeseburger flavor.
- Make Them Higher in Protein. Use a high-protein tortilla to boost the protein even more. With the lean ground beef and cheese, this is an easy way to create a satisfying, high-protein dinner.
- Make Them Lower Carb. Skip the tortilla altogether and serve the cheeseburger filling in large lettuce leaves or over a salad. You’ll still get all the classic burger flavors with fewer carbs.
- Make Them Gluten-Free. Use your favorite gluten-free tortilla and be sure to check the label on your Worcestershire sauce. While many brands are gluten-free, some contain wheat. If needed, you can substitute tamari for a similar savory flavor.
- Swap the Ground Beef. Lean ground turkey works great if you’re looking for a lighter option. The Worcestershire sauce helps add that rich, beefy flavor, so I still recommend using it when making turkey burger wraps.
- Try a Different Cheese. American cheese gives these wraps that classic cheeseburger taste, but cheddar, Colby Jack, Swiss, pepper jack, mozzarella, or gouda are all delicious options depending on the flavor you’re going for.
- Change the Condiments. Ketchup and mustard are classic, but don’t be afraid to switch things up. Barbecue sauce, chipotle mayo, ranch dressing, burger sauce, or a homemade Big Mac-style sauce all completely change the flavor of the wrap without changing the recipe.
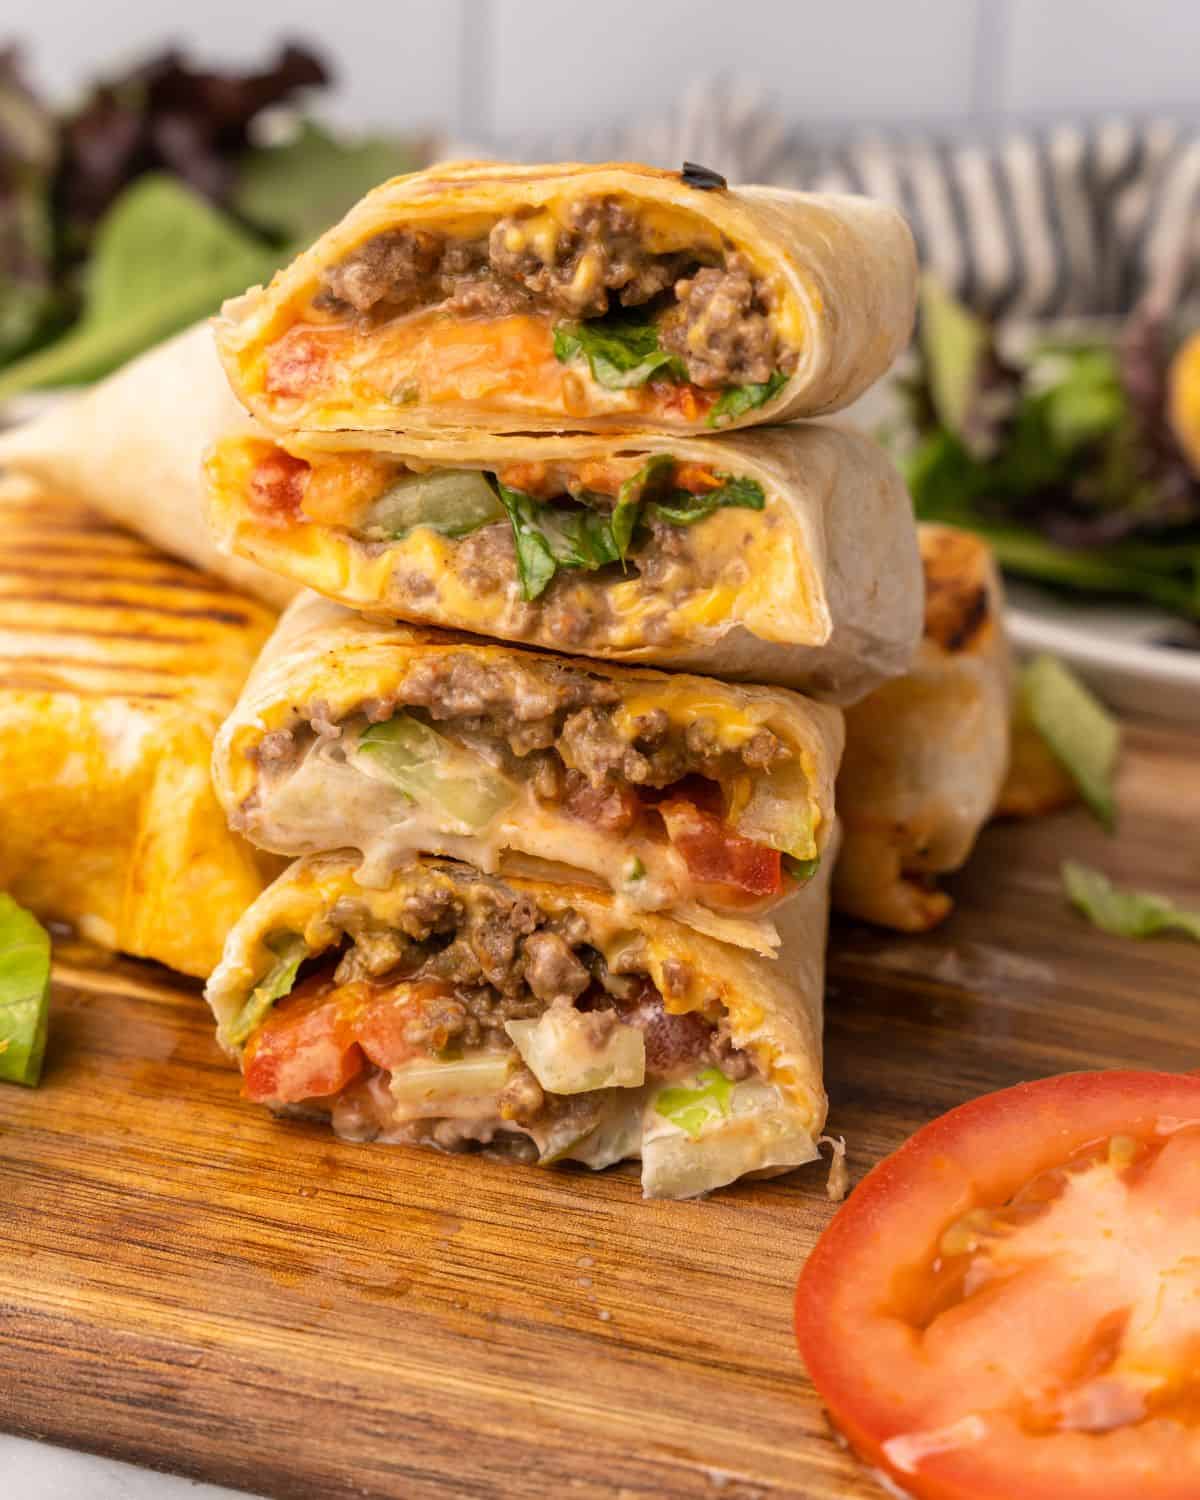
Make-ahead Tips
These cheeseburger wraps come together quickly, but they’re even faster when the ground beef filling is already made.
For the week, cook the cheeseburger filling ahead of time, let it cool, and store it in an airtight container in the refrigerator. When you’re ready to make the wraps, warm the meat, assemble the tortillas with cheese, toppings, and condiments, and grill until crispy.
I don’t recommend fully assembling the wraps too far ahead of time because the lettuce, tomatoes, and condiments can make the tortilla soggy. It’s best to prep the filling and toppings separately, then assemble right before grilling.
For the freezer, let the cooked beef filling cool completely, then store it in a freezer-safe bag or container. Label it and freeze for up to 3 months. When you’re ready to use it, thaw overnight in the refrigerator, warm the beef, and make the wraps as directed.
This is a great recipe to double because the filling can be used for cheeseburger wraps, burger bowls, salads, stuffed peppers, or quick lunches during the week. See more ideas in my make -ahead freezer meals post and ground beef freezer meals post.
Serving Suggestions
These cheeseburger wraps are filling enough to serve on their own, but I usually pair them with a simple side to round out the meal. Here are some of our family favorites.
- If You’re Craving a Burger and Fries. Serve these wraps with Roasted Ranch Potatoes or Roasted Sweet Potato Fries for that classic burger-and-fries feel.
- Add Some Vegetables.To keep things lighter, pair the wraps with Roasted Broccoli, Roasted Asparagus, or Italian Roasted Vegetables. On busy nights, I’ll keep it simple with frozen steam-in-the-bag vegetables.
- Add a Simple Salad. A salad works really well on the side because the wrap is already cheesy and filling. Try Greek Quinoa Salad, Mexican Quinoa Salad, Pesto Pasta Salad, Caprese Pasta Salad, or a simple green salad.
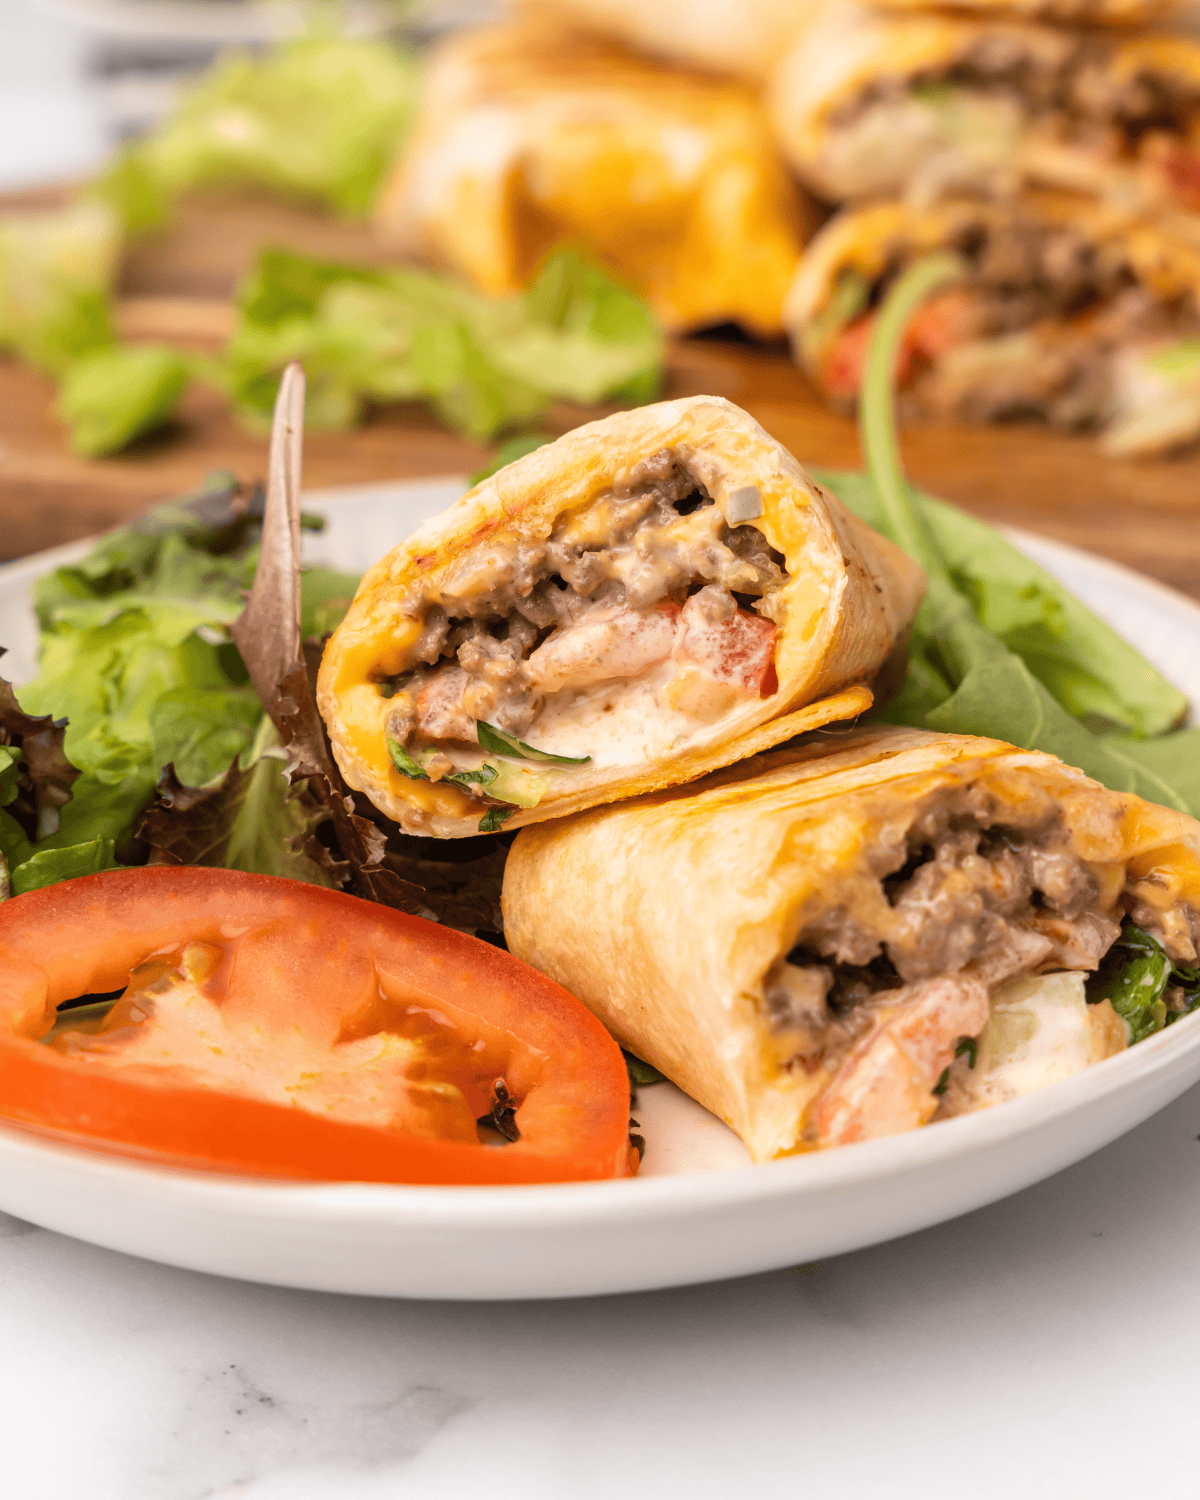
More Healthy Ground Beef Recipes
If you’re always looking for new ways to use ground beef, here are a few of my family’s favorite recipes. They’re easy to make, meal prep-friendly, and perfect for busy weeknights.
- Mini Meatloaves
- Pasta e Fagioli
- Slow Cooker Sloppy Joes
- Crockpot Taco Meat
- Taco Stuffed Peppers
- Homemade Hamburger Helper
Looking for even more ideas? Browse all of my healthy beef recipes.
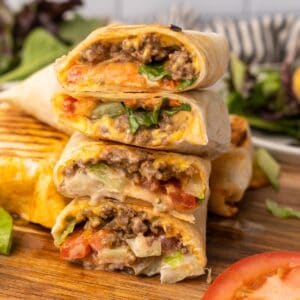
Cheeseburger Wrap
Video
Equipment
- Large skillet
- Indoor Grill Pan
Ingredients
- 1 pound lean ground beef
- 1 tablespoon Worcestershire sauce
- 1 tablespoon ketchup
- 1 tablespoon grated parmesan
- 1 teaspoon onion powder
- 1 teaspoon garlic powder
- 1/8 teaspoon salt
- 1/8 teaspoon pepper
- 5 medium tortilla wraps
- 5 slices American cheese
- 2 Roma tomatoes sliced
- 1 cup of romaine lettuce
- diced onions optional
- Condiments (ketchup, mustard, mayonnaise, relish) optional
Instructions
- In a large skillet coated with cooking spray, cook the beef on medium heat until almost cooked through but still a little pink (about 7-10 minutes). Break beef up as it cooks.
- Stir in the Worcestershire sauce, ketchup, grated parmesan, onion powder, garlic powder, salt, and black pepper to the beef. Mix until thoroughly combined.
- Continue cooking the meat mixture until the beef is cooked through and no longer pink.
- In the center of the wrap, place a slice of cheese and 1/3 cup or so of the beef mixture. Add tomato and lettuce on top of the meat.
- Add some ketchup, mustard, and a little mayonnaise to the filling.
- Roll up and place seam side down on a preheated indoor grill for about 3-4 minutes or until there are grill marks.
- Once there are grill marks, turn the wrap over. Grill for another 3-4 minutes over medium-high heat, remove the wrap from the grill, and set aside.
- Continue with the rest of the wraps.
- Let the burger wraps rest for 1-2 minutes below cutting in half. Serve hot and enjoy!
Notes
Nutrition
FAQS
Yes! I recommend preparing the ground beef filling ahead of time and storing it in the refrigerator. When you’re ready to eat, simply warm the filling, assemble the wraps with your favorite toppings, and grill until crispy. This gives you the best texture.
The cooked ground beef filling freezes beautifully for up to 3 months. I don’t recommend freezing fully assembled wraps because the lettuce, tomatoes, and condiments don’t thaw well. Instead, freeze the filling and assemble fresh when you’re ready to eat.
Medium flour tortillas are my favorite because they’re easy to roll and crisp up nicely. High-protein, low-carb, and gluten-free tortillas also work well – just choose one that’s soft and flexible enough to fold without cracking.
Did You Make This Cheeseburger Wrap Recipe?
If you tried this recipe, I’d love to hear what you think! Leave a comment below and let me know your favorite cheeseburger wrap variation or toppings. Your feedback not only helps me, but it also helps other readers decide which version to try.

Vita says
I was just wondering if anyone knows the ww points for this wrap? Thank you so much!!!
Bernadette Knapik says
Thank you for all the recipes, been sharing them on my FB page. I always used flat outs too, but at Walmart I found Joseph’s Lavash Bread, it’s 100 cals if you eat the whole thing and it is actually bigger than a flat out, I love it and can’t say enough about it or your recipes, I am thrilled that a friend told me about you on FB! Your recipes make my day and hopefully will have others think about healthy and delicious alternatives! Thanks!
Betsy P. says
You could also try some variations – Like I’m thinking one with swiss cheese and mushrooms, or bacon and cheddar, or guacamole (or avacado) with salsa and sour cream… I can’t wait to try the base recipe and then some variations.
April says
Wow, I can’t believe how good this was! I made it exactly as directed and in my wrap used american cheese, ketchup, mustard and pickles and it tasted just like a cheese burger! I am going to make this again soon and quadruple it so I can freeze it for future meals! Thanks!!
Jennifer says
Great recipe! I made these last night and they were a hit with my boys. I will definitely be making them again!
rachel says
I’m so glad I cams across this! My boyfriend is such a picky eater but he loved them! I myself don’t like burgers that don’t fill the bun and I tend to pick off the excesses bread but I loved this idea!! Yummy! Thank you!
Helen says
This site rules! I’m trying this out tomorrow yaay 🙂
Amanda Gibbs says
I found these on pintrest. I have to tell you it was amazing! I tweaked the ketchup/mustard/worcheshire sauce added extra because a friend said it was a little bland when she made hers. Perfect. I am so adding this to our 2 week rotation. Thanks for the recipe.
Tammy says
So glad you liked! This is def a family favorite for us too. My daughter also loved the hamburger meat mixed with homemade Mac n cheese.
Melissa @ Cutting out the Cupcakes says
We loved this recipe. I used sun dried tomato wraps – 100 calories. We also added pickles to ours.
Tammy says
Yes I started adding pickles too and LOVE IT!!
Jaime says
Made these tonite, awesome recipe! I tweeked it a little bit to fit my current diet plans and used ground turkey and also cooked the meat with half a chopped onion and chopped red bell peppers (would have added mushrooms but I was the only one in favor). Tip if you do this, lots of liquid will be in the pan after cooking the turkey, drain it well before you add the ketchup and worcestershire sauce so it holds together better! This will be a new go-to meal for me 🙂
Busy Iowa Mom says
Hubby just found this and we made it for lunch today. It was delish, very filling and even my kids enjoyed it. Perfect substitute for fast food, especially if you already have the meat made ahead and waiting in the freezer!
Kim says
The whole fam loved these! Ty you so much!
Marie says
if you wanted to make them on a regular grill you could just wrap them in foil first so they would fall apart (I usually also do this on my george forman so I dont need to clean it when I’m done!)
Jen says
I made these for supper tonight and they were a HUGE hit!!!!! YUMMY!!! 🙂
Tammy says
SO glad your family loved these! They are a favorite for us too. SOmetimes I take the meat and mix into a baked mac n cheese for hamburger mac n cheese. My girls love it!
Ashley says
Any suggestions for healthy side dishes to serve with this? I am trying to make a change to some healthier options for my family and I, including two kids (5 & 4). This looks delish! But instead of the normal french fries or chips… any other ideas? Maybe sweet potato oven baked fries?
Tammy says
This is a pretty hardy meal so I typically will serve a salad with it. However, sweet potato baked fries sound really good too! Let me know what you decide.
Kelly Griffith says
I just made these for supper and they were DELICIOUS!!! Great recipe…will for sure be making these again! 🙂
Tammy says
Hi Kelly so glad you liked! These are one of our family favorites.