In this post, I want to teach you how to cook brown rice in a rice cooker. I’ll share my foolproof tips for delicious fluffy brown rice every time. Do you want to make ahead and freeze rice ahead of time? Great! I’ll share those tips too!

I am abnormally excited to share with you my basic rice cooker recipe for brown rice. Why? Because I think it will make your life so much easier.
I make a lot of brown rice. A LOT! Every week or so, I break out my rice cooker and make a big batch to use in all kinds of recipes.
If I don’t have a specific recipe in mind, then I keep brown rice in the fridge to use as a healthy side.
Sure, I can make this on the stove-top, but who has 45 minutes to watch a pot of rice cook. Not me! In this rice recipe, you just set it and forget it.
Reasons you’ll love this cooking method
- It’s completely hands-off. It takes less than 5 minutes to add all the ingredients to the rice cooker. Then, turn it on, and you don’t need to think about the rice again until it’s done cooking.
- The recipe options are endless. I use brown rice in stuffed peppers, stir-frys, one-pot meals, bakes, and all recipes that include cooked rice.
- Meal prep superstar – Brown rice stores and reheats perfectly, so making it ahead of time for easy healthy dinner recipes is a no-brainer. You can also freeze rice! I’ll offer more storage tips later on.
Ingredients

Brown rice – I purchase a 4lb bag of organic long-grain brown rice for under $8 at BJ’s wholesale, so that’s what I use in all of my recipes that use brown rice.
Long grain rice doesn’t have as much starch as short grain, so it doesn’t stick together like short grain and is better suited for the recipes I use.
Chicken stock – Rice is a blank canvas and will soak up any flavor it’s cooked in. Chicken stock is my preferred liquid when cooking brown rice.
However, you can undoubtedly cook brown rice in water; it just won’t have that additional flavor layer.
Seasoning – I’m all about flavor when cooking a simple batch of brown rice. For this recipe, I use a mix of garlic powder, onion powder, and salt.
You can play around with all kinds of different spices, but for rice used in various recipes, that’s the spice combination I prefer.
Olive Oil – I add 1-2 tablespoons for flavor and to help prevent sticking.
FAQs
Essentially, brown rice is healthier than white rice. However, it depends on your needs.
If you’re focused on calories, then the rice is tied. So, it comes down to your own health concerns.
White rice is more processed and has a higher glycemic index, causing your blood sugar to rise, giving you that crash and burn effect.
With that said, white rice is more comfortable to digest. So, if you struggle with digestion issues that eating white rice might work better for you.
However, if controlling your blood sugar is an issue then I’d skip the white variety.
Brown rice hasn’t been stripped of the bran and germ, making it higher in protein, fiber, and nutrients. It also takes your body longer to digest, which means you’re full longer and won’t experience a spike in blood sugar.
If the health goal is to keep your blood sugar in check, then eating brown rice is the better choice.
Since brown rice is less processed than white rice, it needs more liquid to cook. Most rice cookers come with a measuring cup and cooking chart, but if you’ve lost both (like me), here’s the formula I use.
The rice to water ratio is 2 cups of water or broth per 1 cup of brown rice.
Brown rice needs more water and a longer cooking time than white rice. There’s both a white and brown rice button on the rice cooker to assure you’re using correctly cooking the brown rice.
No, I’ve never soak brown rice before cooking it, and it’s been fine. Soaking brown rice for too long can result in gummy rice.
Before cooking rice, I rinse it first to remove extra starch. This step helps to prevent the rice from sticking together and also develops a fluffy texture.
Cooking tips
To cook the perfect batch of rice in a rice cooker, these are the four cooking tips I follow.
Rinse the rice first. If you want fluffy rice that doesn’t stick together, I recommend rinsing it before cooking it.
This step removes the extra starch from the outer layer, helping it to cook without sticking together. The result is fuffy delicious rice.
To remove the starch, place the rice into a bowl and add water. Stir the rice a few times until you see the water get cloudy; this is the starch removing from the grain.
Pour the rice into a mesh strainer, rinse with water, and drain.
Cook in a broth – Cooking rice in broth adds a delicious flavor that you won’t get with water. My favorite broth is chicken broth, but any broth will work.
Don’t forget the salt – Using salt during the cooking process is essential! The salt absorbs into the rice as it cooks, giving it a better flavor than if you salted afterward.
Let it rest – After the rice finishes cooking in the rice cooker, I let it rest for another 5-10 minutes. Allowing the rice rest helps all of the liquid evenly absorb.
Fluff it – The last step is to fluff the rice. This step separates the grains and prevents the grains from sticking and clumping together.
Supplies
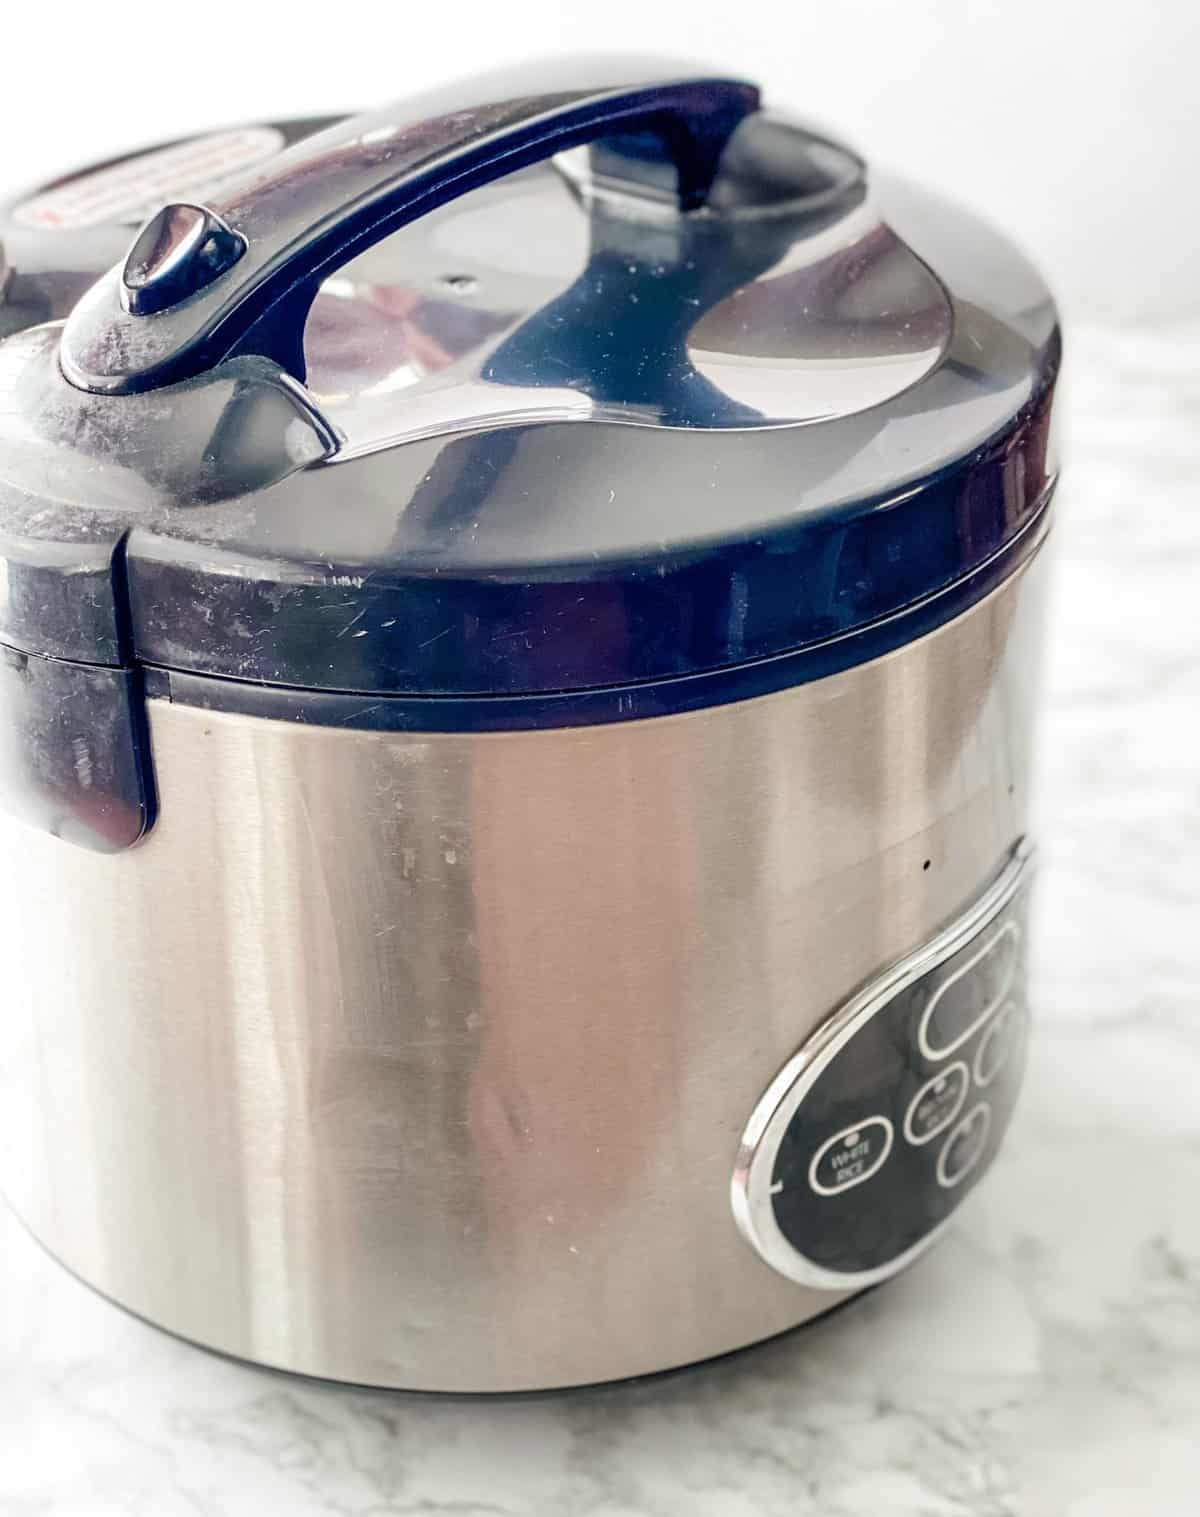
- Rice Cooker – I have the Aroma 8-cup rice cooker.
- Mixing Bowls – I have this set by Pyrex and it’s never failed me.
- Mesh Strainer – This comes in handy for rinsing rice and quinoa.
- Glass Storage Containers – I love this set from Ello.
- Souper Cubes – These silicone trays have become my new secret weapon with freezing meals.
How to Cook Brown Rice in a Rice Cooker (step by step)
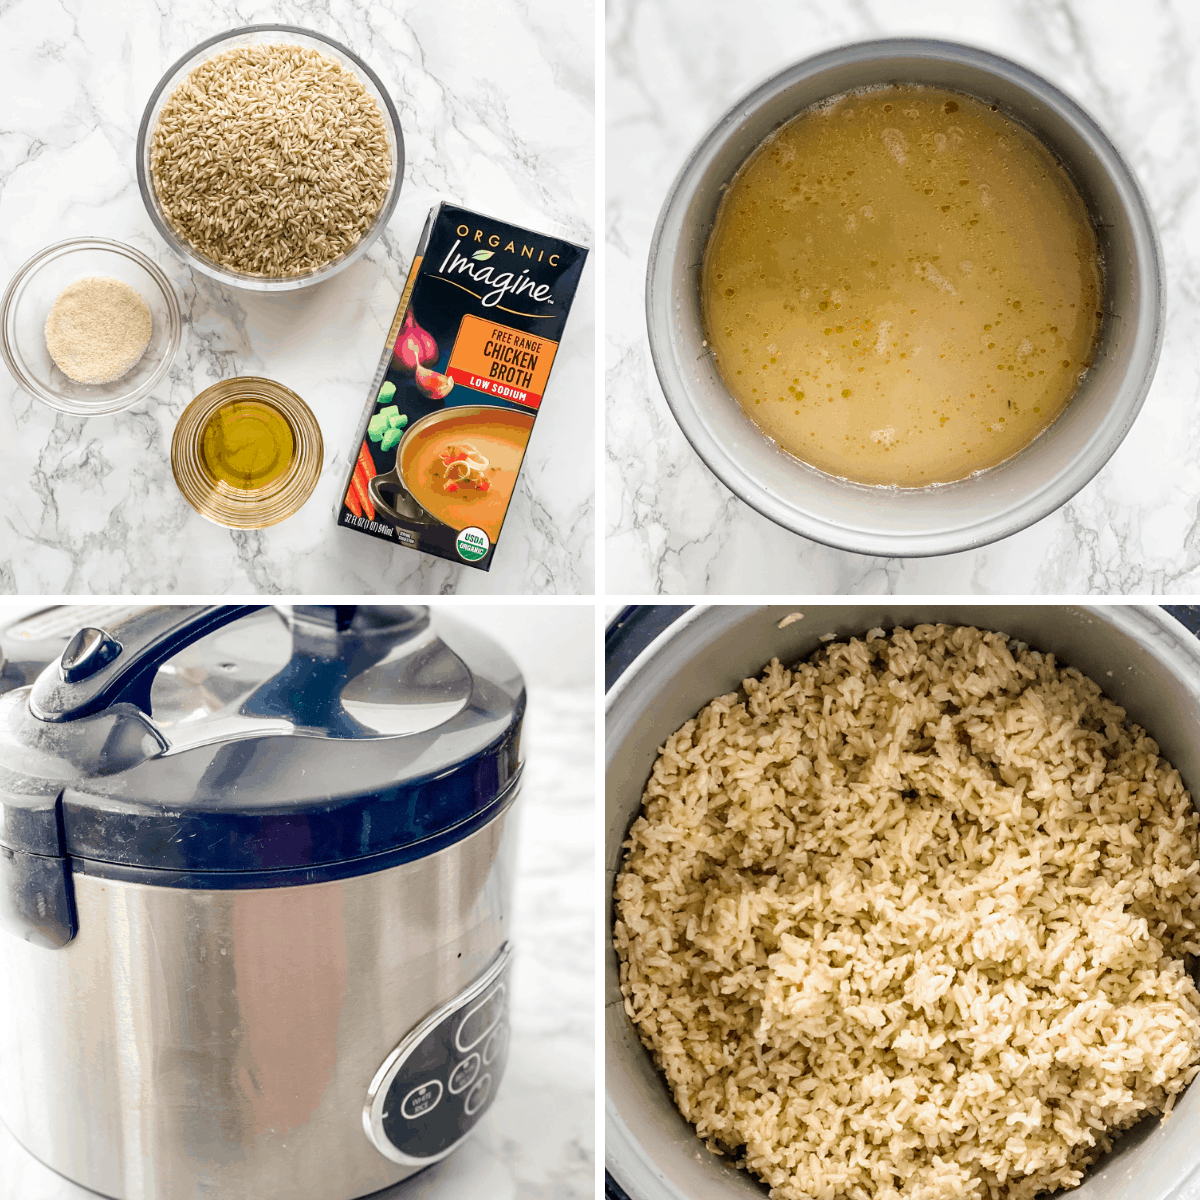
- Put 2 cups of brown rice into a medium mixing bowl. Cover the rice with water. The water should be about 1 inch above the rice.
- Stir the rice a few times until the water is cloudy. Pour the rice into a mesh strainer and rinse again with water.
- Place the rice into the rice cooker and add the broth (or water), olive oil, salt, and seasonings.
- Press the brown rice setting button. Do not open the rice cooker during the cooking process.
- When the rice cooker beeps, your rice is done cooking. Turn the rice cooker off and let the brown rice rest for about 10 minutes.
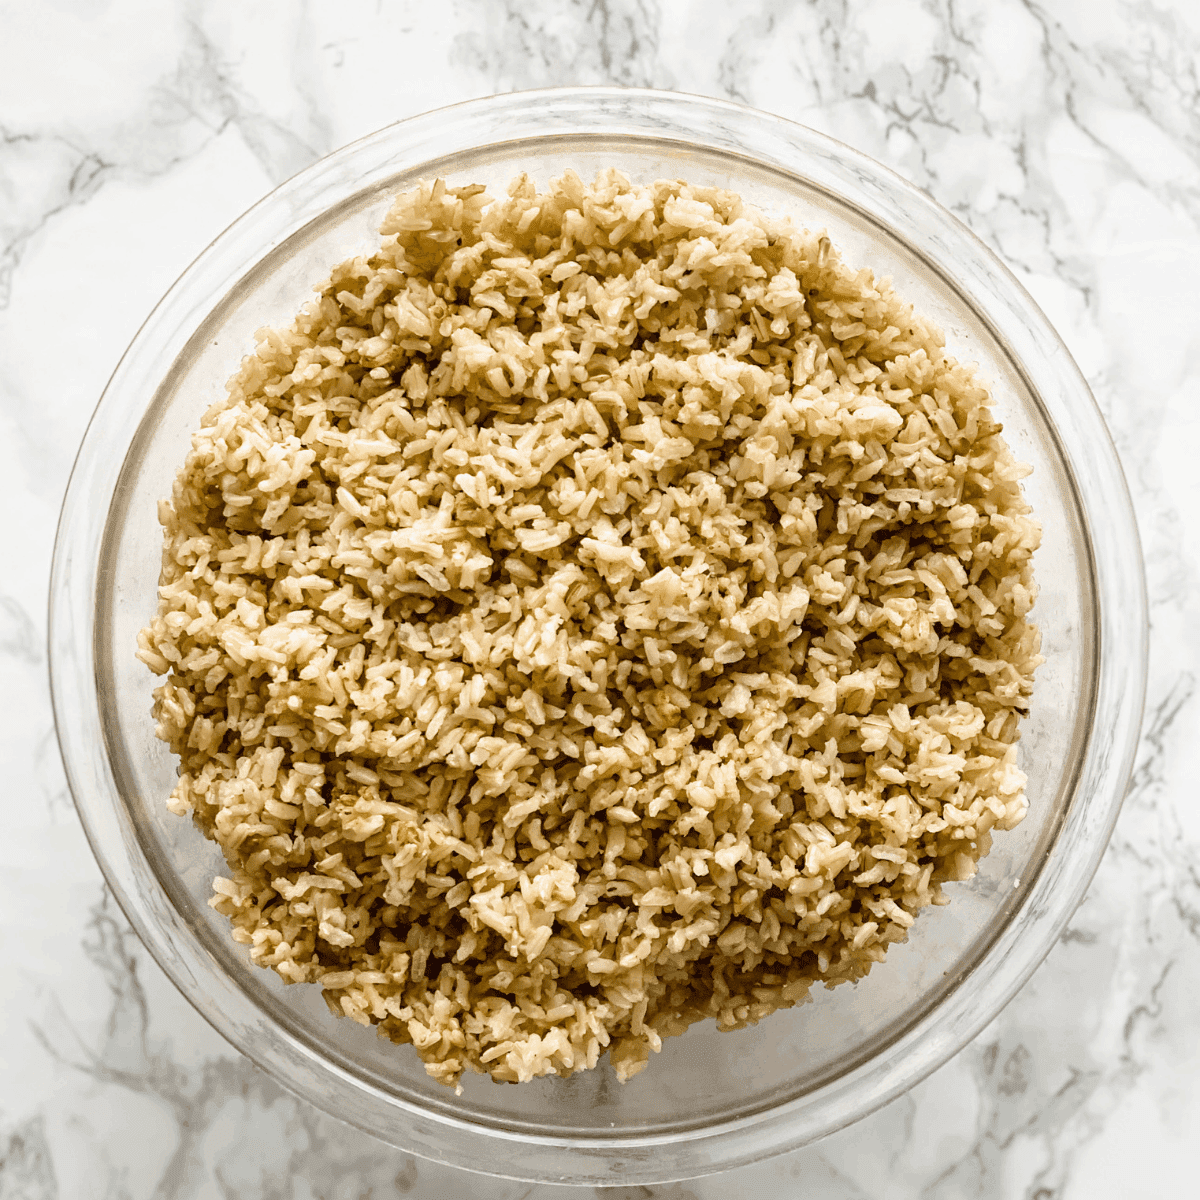
- Fluff the rice with a fork and then use it as needed.
How to use cooked brown rice
Quick healthy dinner ideas are endless when there’s cooked brown rice in the fridge or freezer.
I like to make:
- Casseroles and bakes
- Stir-frys
- Burrito bowls
- Soups
- Stuffed peppers
We also love to use cooked brown rice for an easy side during the week. It goes great with pot roast, Mexican shredded beef, slow cooker salsa chicken, cheeseburger meatloaf, or sheet pan steak fajitas.
Here’s a list of my favorite brown rice recipes. These recipes are super easy to prep when the rice is prepared ahead of time.
- One-Pot Chicken and Rice
- Shrimp Fried Rice
- Italian Stuffed Peppers
- Cheeseburger Stuffed Peppers
- Turkey Taco Meal Prep Bowl
How to store brown rice
In the refrigerator
After I cook the rice, I either use it in a recipe, store it in the refrigerator, or freeze it.
To store rice in the refrigerator, place it into glass storage containers and then keep it in the fridge for up to 5 days. If I’m using a recipe, I’ll prep the recipe and store it in the refrigerator or freezer.
In the freezer
Let the rice cool slightly before storing it in the freezer. You still want the rice to be warm when you package it up. This method helps retain its moisture and will result in nice fluffy and fresh rice when you reheat it.
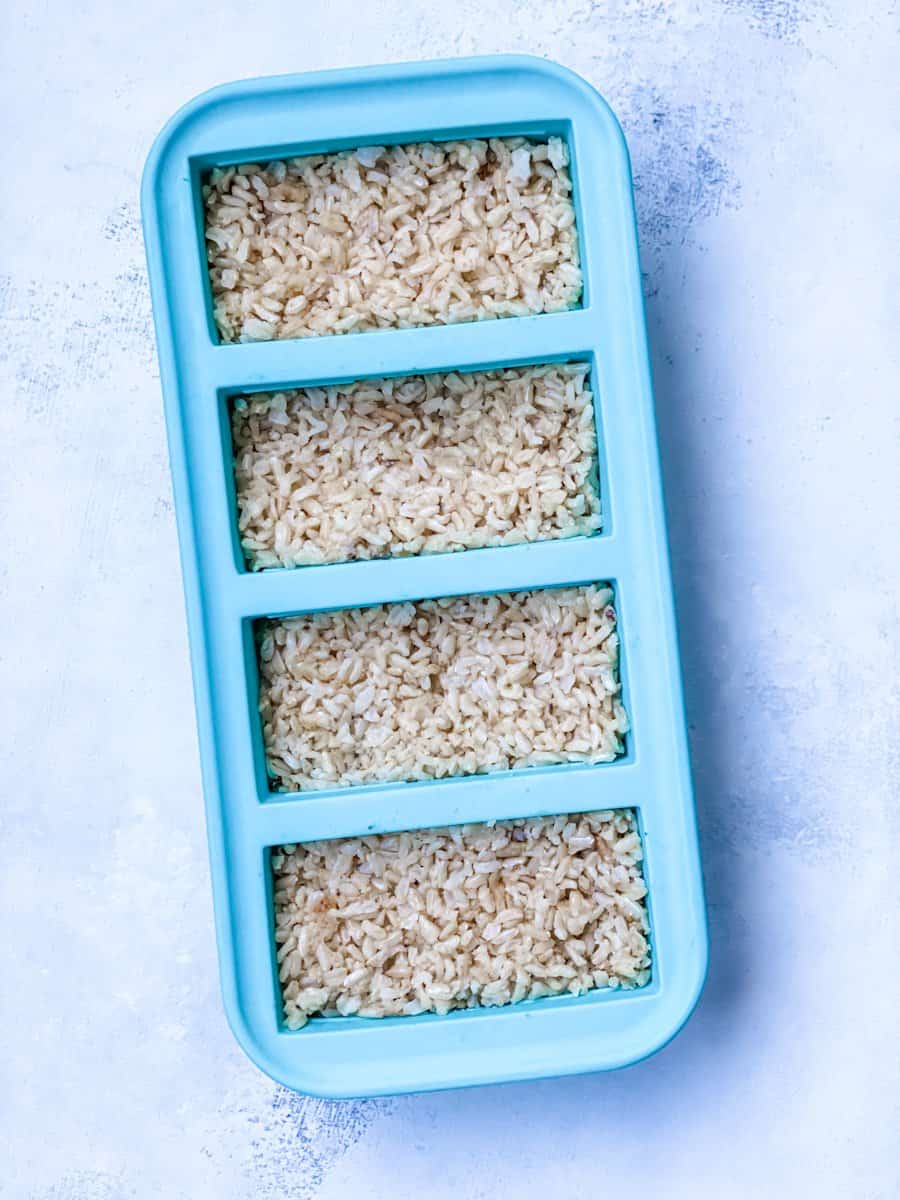
Portion the rice out and place it in freezer bags. I measure my rice into 1 1/2 – 2 cup portions because that’s typically the amount in a recipe.
A space-saving tip is to flatten the rice in the freezer bags. Doing it this way makes the rice stackable or able to fit into small spaces.
Freezing into blocks using Souper Cubes is another way to portion out and freeze rice.
Cooked rice will last approximately 3-4 months in the freezer.
To thaw frozen rice, remove from the freezer bag, place it into a microwave-safe container, and warm it up for about 2-3 minutes. After it’s hot, then use the rice in your favorite recipe

How to Cook Brown Rice in Rice Cooker
Ingredients
- 2 cups long-grain brown rice
- 4 cups chicken broth vegetable broth, or water.
- 1/2 teaspoon salt
- 1/2 teaspoon garlic powder
- 1/2 teaspoon onion powder
- 1 tablespoon extra virgin olive oil
Instructions
- Add the rice into a mixing bowl and fill it up with water. The water should be about an inch above the rice. Using a spoon, give it a few stirs until the water is cloudy.
- Pour the rice into a mesh strainer and then rinse with water.
- Add the rinsed rice into the rice cooker insert with the chicken broth, salt, garlic powder, onion powder, and olive oil. Give it a couple of stirs.
- Close the lid and set the rice cooker to the brown rice setting. Cooking time is between 1 1/2 – 2 hours.
- When the rice is done the rice cooker will beep. Turn the rice cooker off and let it rest for 10 minutes.
- Fluff the rice with a fork and then use as needed.
Notes
How to store brown rice
In the refrigerator After I cook the rice, I either use it in a recipe, store it in the refrigerator, or freeze it. To store rice in the refrigerator, place it into glass storage containers and then keep it in the fridge for up to 5 days. If I’m using a recipe, I’ll prep the recipe and store it in the refrigerator or freezer. How to Freeze Brown Rice Let the rice cool slightly before storing it in the freezer. You still want the rice to be warm when you package it up. This method helps retain its moisture and will result in nice fluffy and fresh rice when you reheat it. Portion the rice out and place it in freezer bags. I measure my rice into 1 1/2 – 2 cup portions because that’s typically the amount in a recipe. A space-saving tip is to flatten the rice in the freezer bags. Doing it this way makes the rice stackable or able to fit into small spaces. Freezing into blocks using Souper Cubes is another way to portion out and freeze rice. Cooked rice will last approximately 3-4 months in the freezer. To thaw frozen rice, remove from the freezer bag, place it into a microwave-safe container, and warm it up for about 2-3 minutes. After it’s hot, then use the rice in your favorite recipeNutrition
Have you tried this recipe? If so, I’d love for you to rate this recipe and leave a comment below. We all learn from each other’s experiences. Also, it would be awesome if you could share a picture on Instagram and tag it #organizeyourselfskinny. I can’t wait to see it!
Liz says
Get a DuoPot. Rice takes 12 minutes.
Stephanee says
This thread may be long dead, but does anyone have advice on whether it’s safe to use this method for travel? For instance, if I pre-cook rice and freeze it, then put the frozen bags in a cooler and transfer that to a hotel mini-fridge once I arrive. (Drive is about three hours.) How long will it stay fresh at that point, refrigerated? I have dietary restrictions that make travel and food difficult, and I am always looking for the best way to do this! Has anyone mixed anything in with the rice before freezing, such as cooked vegetables and maybe shredded chicken?
Thank you!
Tammy Kresge says
As long as you keep it cool it should work fine. Yes I’ve mixed all kinds of food in before freezing and it works great. Very convenient.
Colleen says
Wonder if quinoa would freeze the same way? Ever tried it?
Tammy Kresge says
Yes I have and yes it does
Deanna says
i have been doing this for years. A couple of tips for you: Before microwaving in a bowl, wet fingers and sprinkle a little water over the rice, then cover with a small plate. This resteams the rice as it warms and it comes out perfect.
rosie says
Thanks for so many good tips! Rice is a pain to cook for 1, but it had never occurred to me to freeze it.
Michele Turner says
Can the freezing method work with other flavored rice, chicken, Spanish, or fried? When we use our RV this would be so easy to keep on hand. Thanks for he great tips.
Caroline McKay says
Thank you for this, I am pregnant and feeling awfully tired most of the time and have other health issues which makes cooking all the time hard so today I made a homemade curry and brown rice and portioned it out into foil dishes and am going to freeze it, I dont have a microwave though so will have to add a few drops of water and cook them in the oven, my worry was bacteria in the rice but I am hoping if its cooked till piping hot it will be okay, any advice for oven cooking from frozen??
Jessie Rose says
Not sure why I really searched for a guide on how to freeze rice, but this super-simple method helped me a lot! Thanks for posting, this will be utilized shortly. 🙂
Katherine Kuzmeskas says
Love this! We did this with our Healthy Aging class at UConn in Hartford! I’m writing about it in my blog this week, and will link to your directions for “How To”. There are so many tricks to freezer cooking! Thanks for sharing 🙂
Tammy says
Thank you so much! I do this every week and it makes my life much easier!
magnoliasouth says
One other tip on reheating. Once you put the rice in a microwave safe bowl, dampen a paper towel and place it on top of the bowl. This helps reheat with steam and I’ve found it adds a more freshly cooked texture. It’s just enough to re-steam it a bit.
JaneG says
I’ve been freezing individual portions of brown rice for many years, ever since my kids left home and I am cooking for just one. I cook the rice and use the old Tupperware hamburger form to make 1/2 cup servings into what looks like rice cakes – put them on a tray to freeze, then pop into a freezer bag or round container. So convenient to have on hand to add to a stir-fry or even as a healthy snack reheated with a little butter, some raisins and cinnamon & sugar. Also cook and freeze Irish oatmeal (groats/steel cut) to have on hand for breakfast – reheat with a little milk. Any long cooking grain can be cooked and frozen for convenience and to save time when preparing an otherwise quick meal – really helps to keep it healthy when you don’t have the time for the long cooking required by many of these healthy grains. Glad to have found your website through Snack Girl 🙂
Rebecca says
I love that idea! I have the hamburger press from Tupperware and will definetly use it now. Both for my steel cut oats and brown rice! Thank you.
Tessa says
Just wondering if you have any advice on how to cook/defrost the rice without the use of a microwave 🙂
Great instructions other than that, I’m putting on my big batch of rice right now.
Tammy says
Hi there! If you don’t use a microwave then you can warm as you would other foods. You can warm on the stove or in the oven. Hope that helps.
SK Rainsford says
I also was wondering about the No Nukes option. Warming rice can be tricky. Normally I add an oz. or two or water into the pot and keep a lid on it, low heat., (if stovetop) for 10 min. The water “steams-heats” it and keeps it moist. But if it’s frozen should you thaw at room temp first or not?
2girlsonabench says
Awesome we’re totally going to try this, we love brown rice!
Sarah says
What a simple and good idea. I’m sick of buying the grocery store 2 portion jawns because of the sodium and lack of deliciousness. Bravo!
Tammy says
This is such an easy and basic concept. However one that I did not think about until recently….so I thought it would be good to post it for people just getting started with freezing foods.
Thanks so much for popping in!