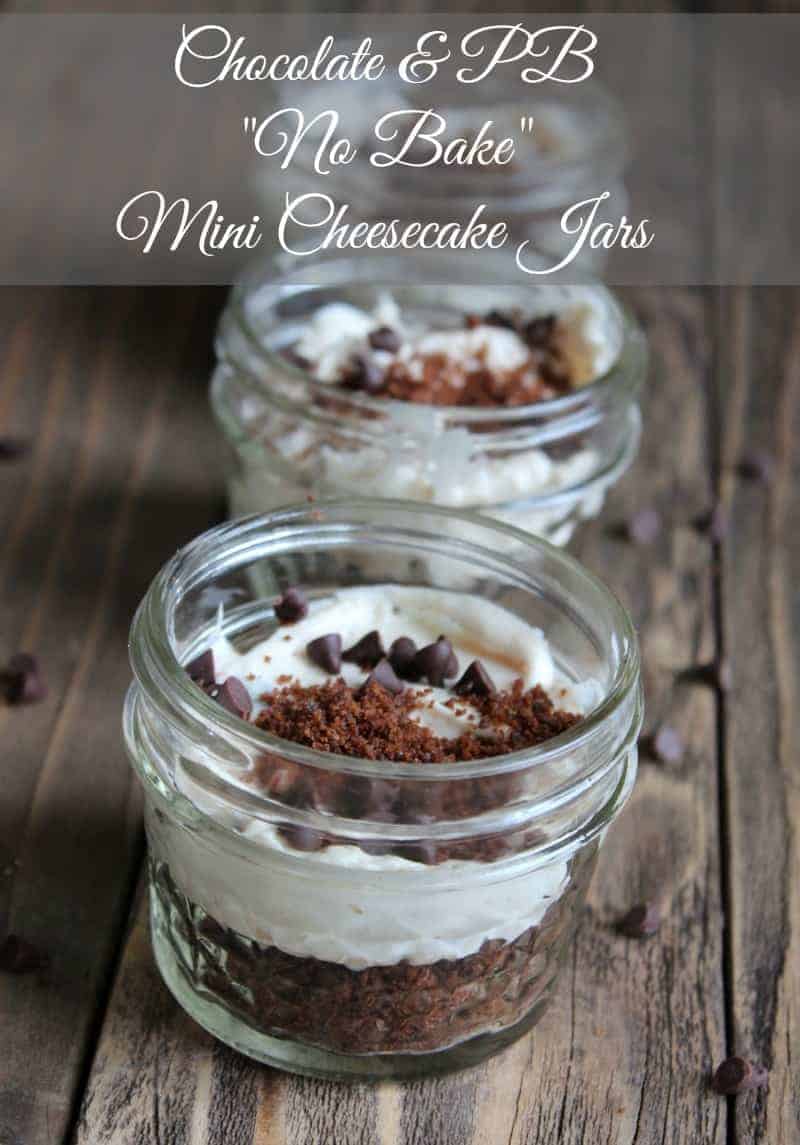
A couple weeks ago I made a “no bake” strawberry cheesecake jar and my family loved them. Because they were such a hit I decided to make a different version using my two favorite dessert ingredients – chocolate and peanut butter. I know I am obsessed with peanut butter and chocolate but at this point in my life I am not going to fight it. However, instead of gorging on jumbo size reese peanut butter cups I try to find other ways to enjoy my favorite ingredients.
Enter my new chocolate & peanut butter “no bake” mini cheesecake jars. These perfectly portion controlled desserts are exactly what is needed when a craving hits. They are rich, creamy, and oh so chocolaty and peanut buttery. Delish!
These are really easy to make and would be perfect to bring to a party or simply just keep in the refrigerator for the family to enjoy all week long.
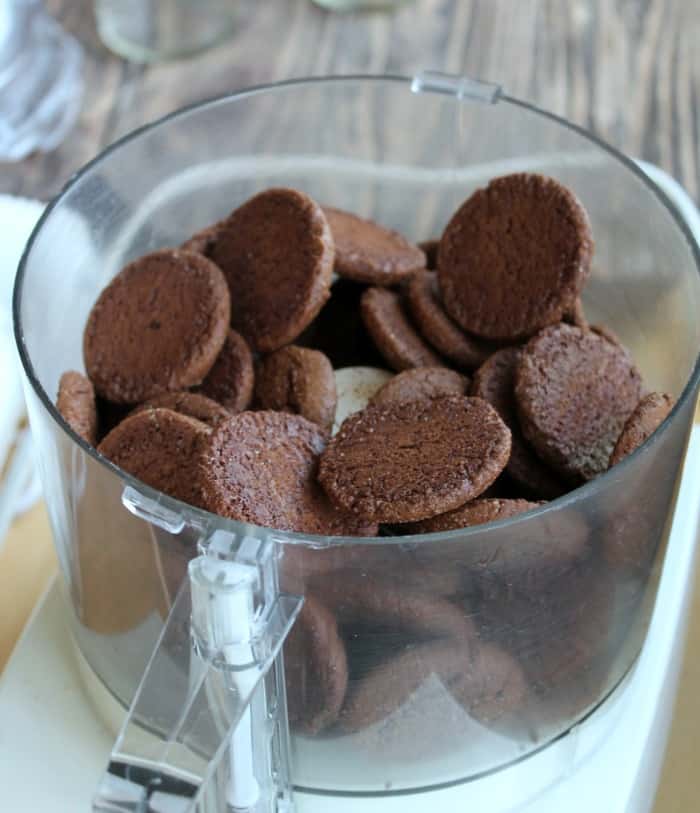
Lets start with the crust. Basically, this crust is just a cookie crumble of sorts. I used Mi-del Swedish Style Chocolate Snaps. I processed the entire bag but only used about half the crumbs. The rest I put into a freezer bag and froze for a future recipe. Next time I will only process half the bag and use 2 tablespoons of butter. That is what I used for the directions and to figure out the nutritional information.
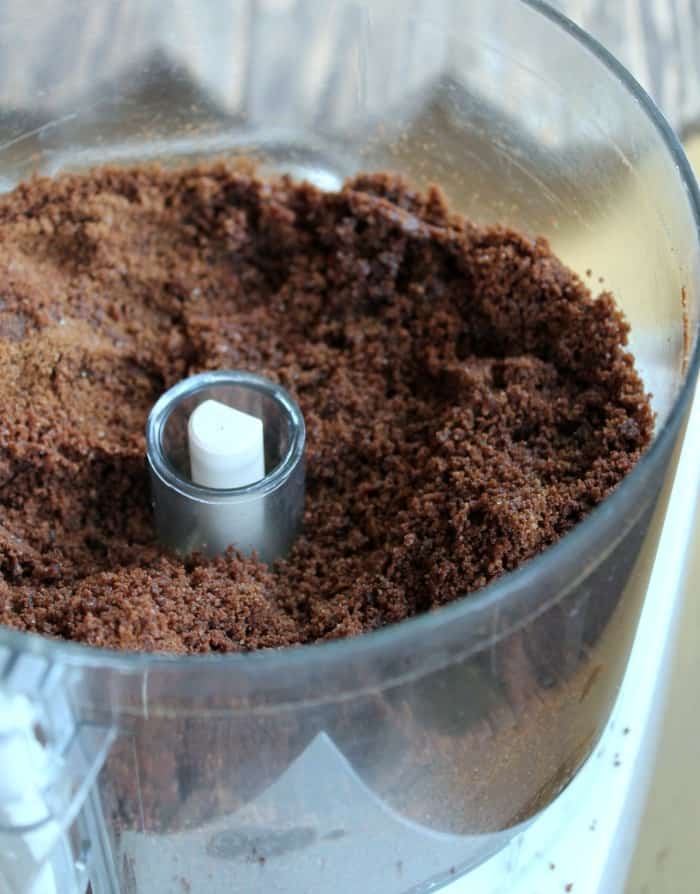
After the cookies turn into crumbs you add in the melted butter. This makes the crumbs stick together and helps to form the “crust”.
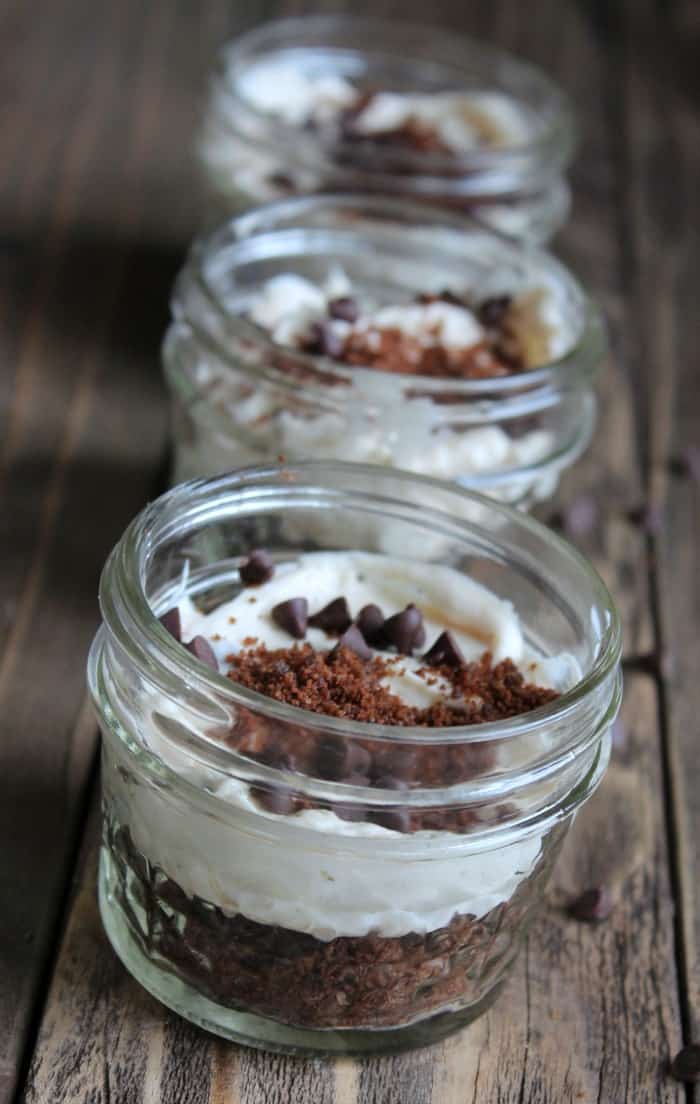
Once the crust was made I spooned about a tablespoon of crumb mixture into 12 (4-ounce) glass jelly mason jars. Then I put the jars in the refrigerator to set a bit as I made the cheesecake filling.
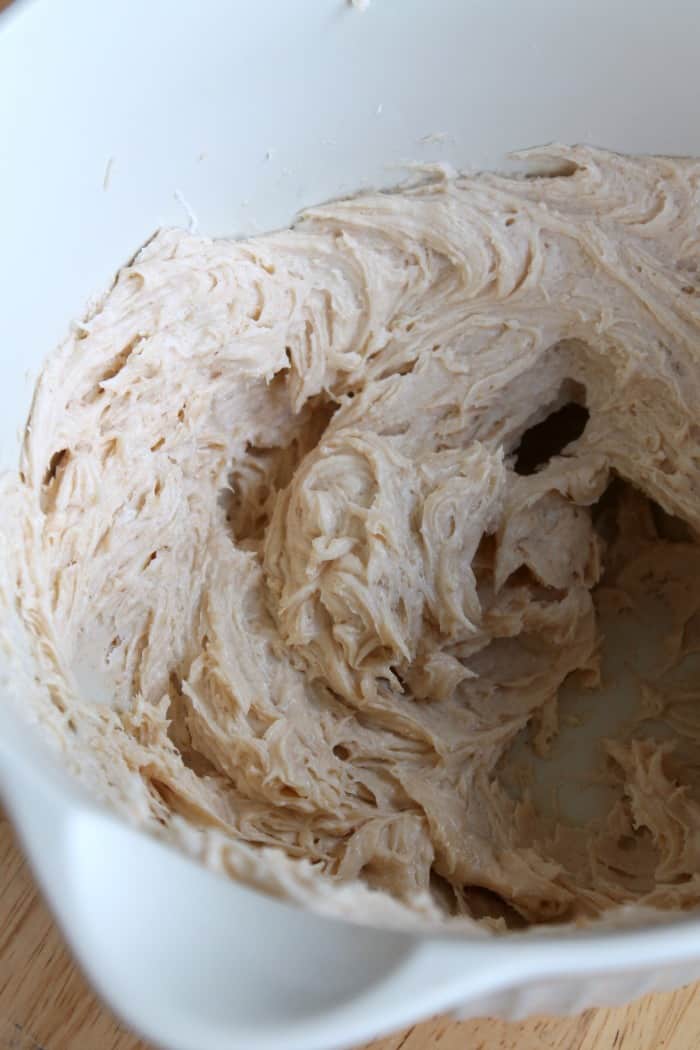
For the cheesecake filling I used low-fat cream cheese, peanut butter, sugar, and a splash of vanilla. Of course, I used the natural organic peanut butter. You want the peanut butter to be soft so if it has harden up a bit from being in the refrigerator just let it sit out for a few minutes.
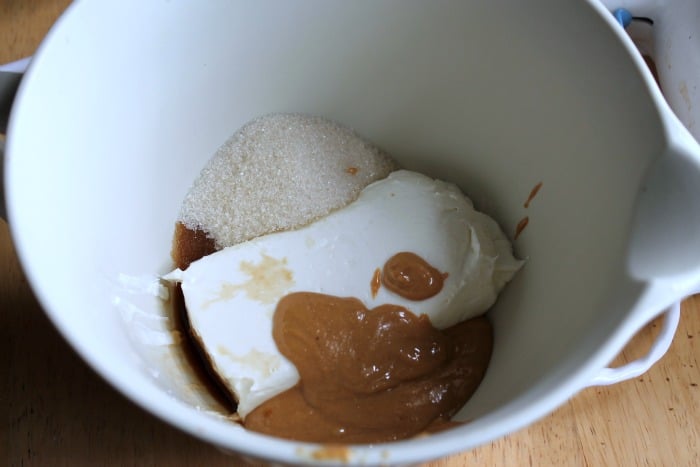
Next I used a hand mixer to blend all the ingredients together. You want it to be smooth and creamy.
Then I folded in the whipped topping and 4 tablespoons of mini chocolate chips. I have said this before but I use the brand Truwhip when I need whipped topping – it is a much healthier version. You can read about the nutritional information here.
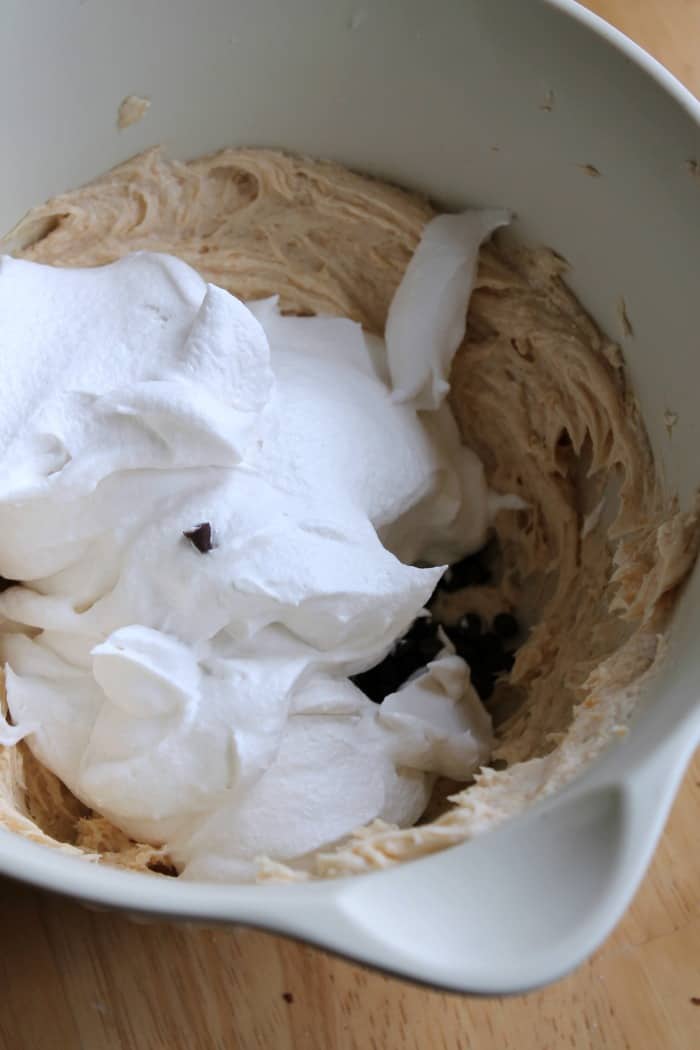
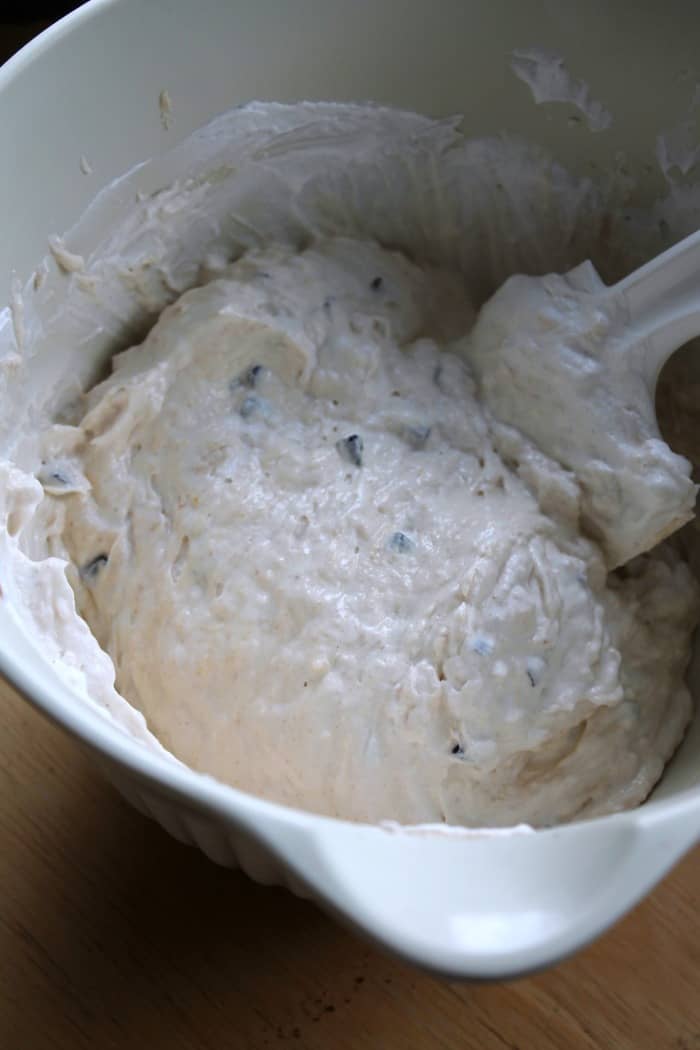
This is what it looks like after the Truwhip and chocolate chips are folded in. The whipped topping gives it a wonderful flavor and enhances the texture. It is like a bowl of cheesecake heaven.
We are now ready to ensemble our mini cheesecakes. Take the jars out of the refrigerator. The crust won’t be super firm but don’t worry it will set a bit after it spends some more time in the refrigerator.
Spoon about 2 tablespoons of cheesecake filling into each of the 4-ounce mason jars. It doesn’t need to be exact. If there is leftover filling then just divide it among the jars. Use a spoon and spread the filling so it covers the crust.
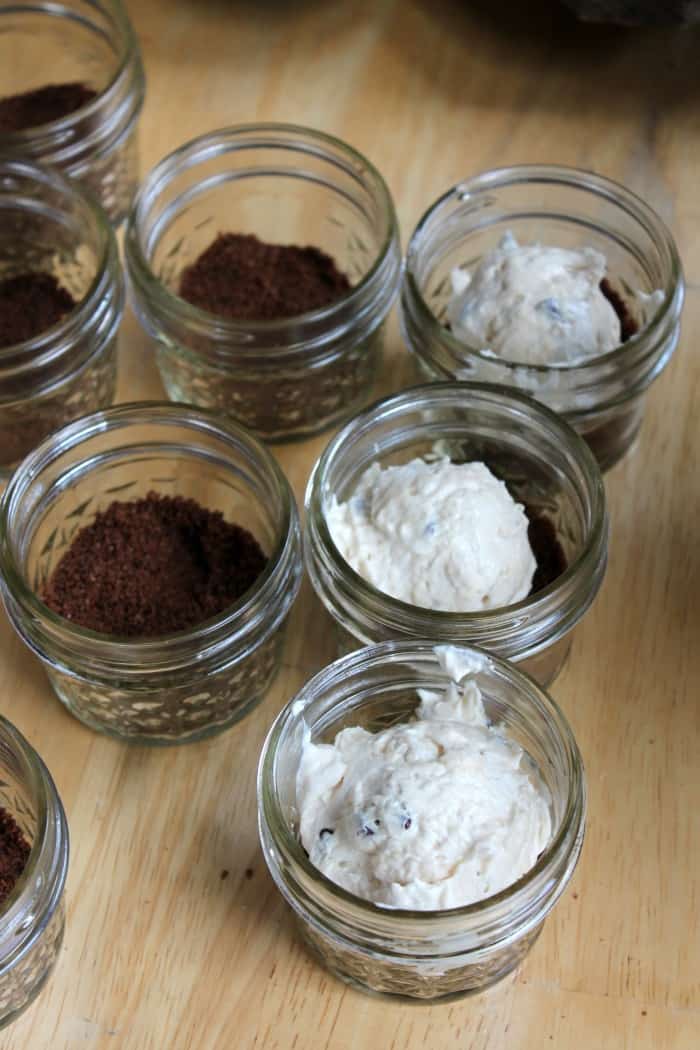
Last, sprinkle the remaining chocolate chips and crumb mixture on top of the cheesecake filling. If you have leftover cookie mixture you can freeze it or add more to the jars if you’re feeling a little naughty.
After you have the cheesecake jars prepared place the lid on and stick back in the refrigerator 2-3 hours.
These little jars of joy will make any bad day good. The batch I made lasted all week in the refrigerator and were just as good the last day as they were the first.
Each jar is 274 calories and 7 weight watchers points plus.
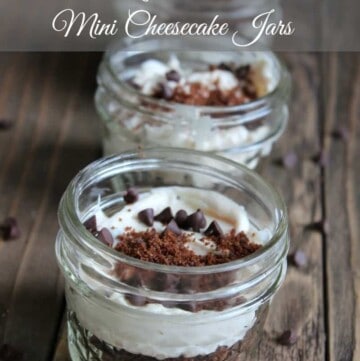
Chocolate & Peanut Butter “No Bake” Mini Cheesecake Jars
Print Pin RateIngredients
- ½ 10-ounce bag chocolate snaps
- 2 tablespoons butter melted
- 12 {4-ounce} mason jars
- 1 {8-ounce) block low-fat cream cheese softened
- ¼ cup creamy peanut butter softened
- ¼ cup sugar
- 1/2 teaspoon pure vanilla extra
- 1 ½ cups whipped topping
- 6 tablespoons mini chocolate chips divided
Instructions
- Place chocolate snaps in a food processor and pulse until you get crumbs. Slowly add in the butter and pulse a few more times until the crumbs start to stick together.
- Spoon 1 tablespoon of the crumb mixture into each of the jars and press down. Place jars into the refrigerator.
- Place the cream cheese, peanut butter, sugar, and vanilla extract into a medium bowl and beat with a hand mixer until all the ingredients are combined and creamy.
- Slowly fold in the whipped topping and 4 tablespoons of mini chocolate chips.
- Take jars out of the refrigerator and spoon 2 tablespoons of cheesecake filling into each of them. If there is leftover filling just divide it evenly among the jars. Spread the filling over the crusts.
- Sprinkle the rest of the chocolate chips and some of the crumb mixture over each of the jars.
- Put the lid on and return to the refrigerator for 2-3 hours. Serve cold.
Colleen Benedict says
I would like to make 1 giant dessert instead of all the minis. What size pan should I use?
Tammy Kresge says
Not sure because I’ve only made them in the jars. I would maybe do a 9x 13
lydia says
Could i ship theses over seas for my brother a marine for Christmas? Would they stay good?
Tiffany Wilson says
Can you freeze these since it makes so many at one time? If so, how do they taste when you take them out?
Tammy Kresge says
I never froze these but I bet it would work.
easypeasy says
Madly in love with chocolate and peanut butter combo! This sounds like the perfect desert for a peanut butter and chocolate addict! 🙂